Zigbee2MQTT is a fantastic tool for integrating Zigbee devices into Home Assistant, but sometimes the default icons don’t match the specific version of your device. For example, I’m using an IKEA E2204 smart plug (North American version, the TRETAKT), but Zigbee2MQTT displays the European version. To fix this, I set a custom icon, and in this guide, I’ll show you how to do the same for any device.
Steps to Set Custom Icons in Zigbee2MQTT Home Assistant Add-On
1. Open Your Home Assistant Configuration Folder
You’ll need to access the zigbee2mqtt folder in your Home Assistant config directory. I use the Studio Code Server add-on to do this, but you can use any method you prefer.
- If using Studio Code Server, navigate to
config/zigbee2mqtt/.
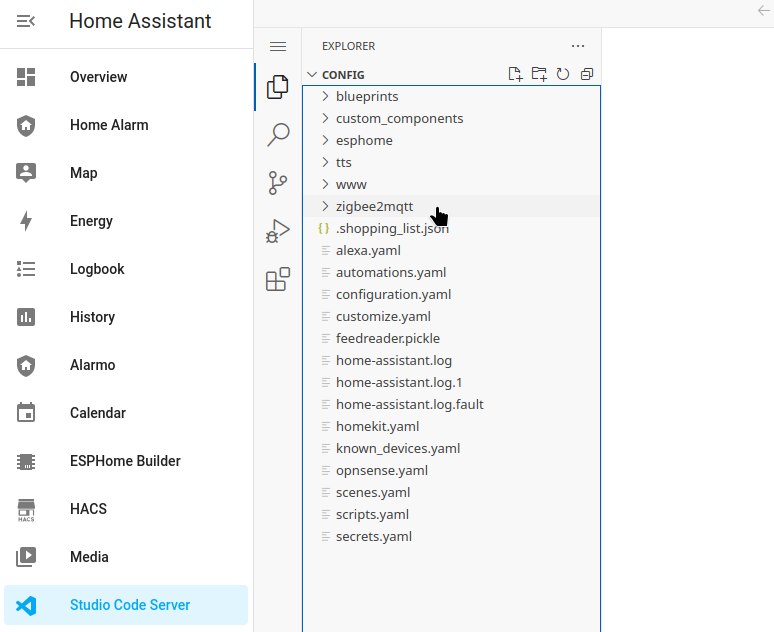
2. Create the device_icons Folder
If the device_icons folder doesn’t already exist inside the zigbee2mqtt directory, create it.
- In Studio Code Server, right-click inside the
zigbee2mqttfolder and selectNew Folder. - Name the folder
device_icons.
3. Add Your Custom Icon
For best results, your icon should be:
- A PNG file
- 512×512 pixels
- Have a transparent background
To add it:
- Drag and drop the PNG file into the
device_iconsfolder using the Studio Code Server file browser. - Alternatively, upload the file using an SCP tool or any other method that works for you.
For my IKEA E2204 smart plug, I named my file:
ikea-tretakt-smart-plug.png
4. Assign the Icon in Zigbee2MQTT
Now that the icon is in place, it’s time to assign it to your device in Zigbee2MQTT.
- Open
Zigbee2MQTTin Home Assistant. - Find your device in the
Deviceslist and click on its name. - Go to the
Settingstab. - Scroll all the way down to the
Iconbox. - Enter the relative path of your icon, e.g.:
device_icons/ikea-tretakt-smart-plug.png - Click
Submit.
5. Verify Your New Icon
Once you’ve assigned the custom icon:
- Go back to the
Devicespage in Zigbee2MQTT. - Your new icon should now appear next to the device name!
Final Thoughts
Using custom icons in Zigbee2MQTT in Home Assistant is a great way to make your smart home setup more intuitive and visually appealing. Whether you’re correcting an incorrect default icon or just want a personalized look, this method is quick and easy!


Leave a Reply