Learning how to make ethernet cables yourself is a cost-effective and customizable way to build a network setup that fits your exact needs. Buying premade cables limits you to fixed lengths and can quickly get expensive, especially if you need several cables of different sizes. By crimping your own cables, you can create perfect lengths for your home or office, improve cable management, and even ensure higher quality by using better materials.
This comprehensive guide will walk you through everything you need to know, from selecting the right cable and connectors, to crimping, testing, and troubleshooting your custom cables.
Why Make Your Own Ethernet Cable?
There are several advantages to building your own network cables:
- Custom Lengths: No more coiled-up mess or cables that come up just short. Instead, you can make cables the exact length you need.
- Cost Savings: Bulk ethernet cable and connectors are far cheaper per foot than buying pre-made cables.
- Better Quality Control: You choose the cable type, shielding, and connectors, therefore avoiding cheap copper-clad aluminum (CCA) cables.
- Skill Building: This is a useful DIY skill for anyone interested in networking, home labs, or IT work.
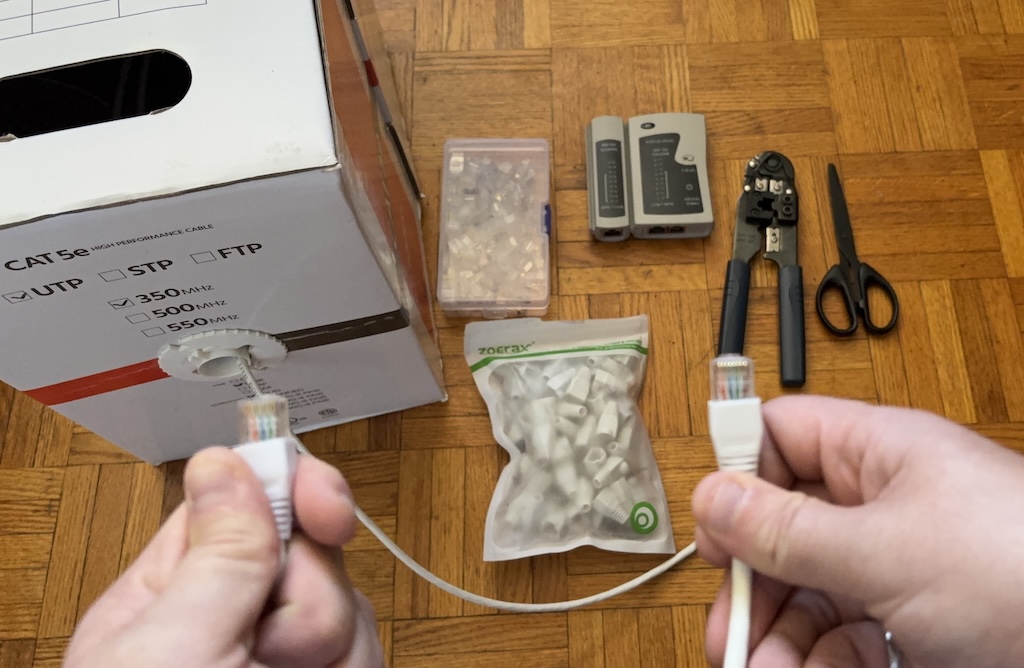
Tools and Materials Needed
Here’s what you’ll need to make DIY ethernet cables successfully:
- Ethernet Cable (Cat6, Cat6a, or Cat5e): Prefer solid copper rather than CCA for best performance and compliance with standards. Cat6 bulk cable on Amazon
- RJ45 Connectors: Choose connectors rated for your cable type (Cat6, Cat6a, or Cat5e). Passthrough connectors are easier for beginners. Cat6 RJ45 passthrough connectors
- RJ45 Crimping Tool: Used to secure connectors to the cable. Most crimpers also include a wire cutter and stripper. RJ45 crimp tool
- Cable Tester (Recommended, but optional): Ensures your wiring is correct and detects any faults. Basic cable tester or advanced network tester
- Strain Relief Boots (Recommended, but optional): Add durability to the connector ends. Strain relief boots
- Wire Cutters/Scissors: For trimming cable and internal wires. Wire strippers/cutters
Tip: Avoid “Cat7” or “Cat8” cables sold cheaply online. These are not officially recognized Ethernet standards and often use questionable materials.
Step 1: Measure and Cut Your Cable
Pull the amount of cable you need from the box, then add roughly 30 cm (about 1 foot) of extra length for trimming and flexibility. Cut the cable cleanly using the crimper’s cutting blade or a pair of wire cutters.
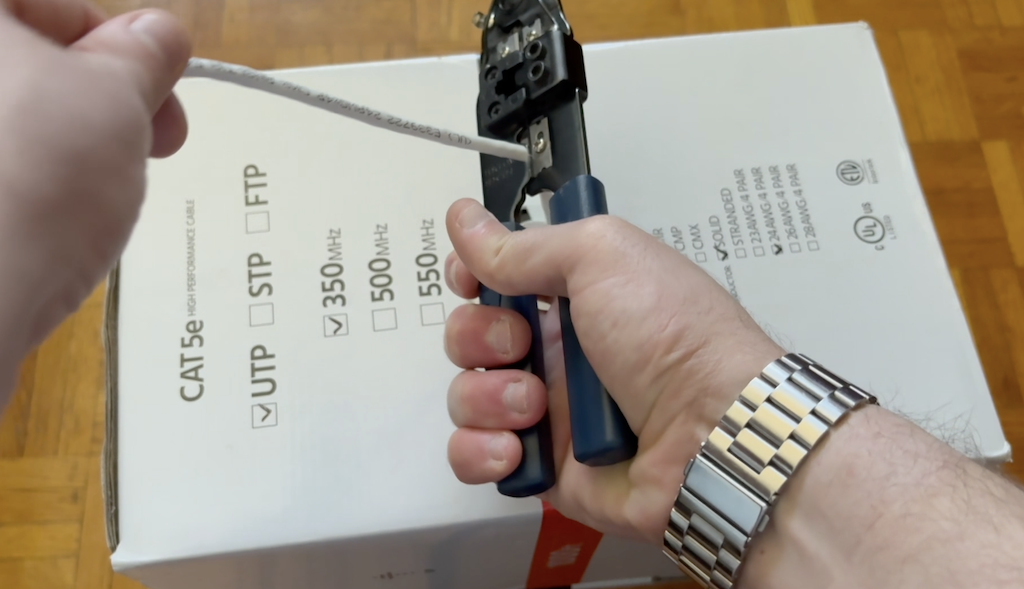
Step 2: Strip the Outer Jacket
Use the stripping blade on your crimping tool (or a dedicated wire stripper) to remove 5–10 cm (2–3 inches) of the outer jacket from both ends of the cable. Be careful not to nick the internal wires.

After that, remove the internal string, if present.
At this stage, slide on the strain relief boots if you’re using them—forgetting them is a common mistake. Therefore, it’s best to add them now. You want the larger side facing outward from the end of the cable on both sides.
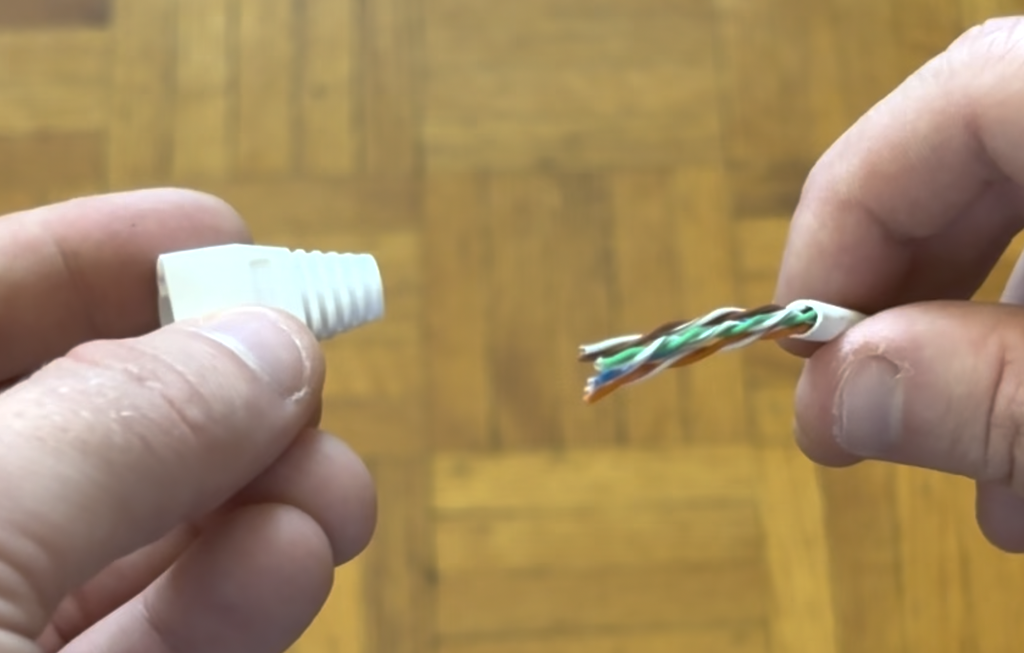
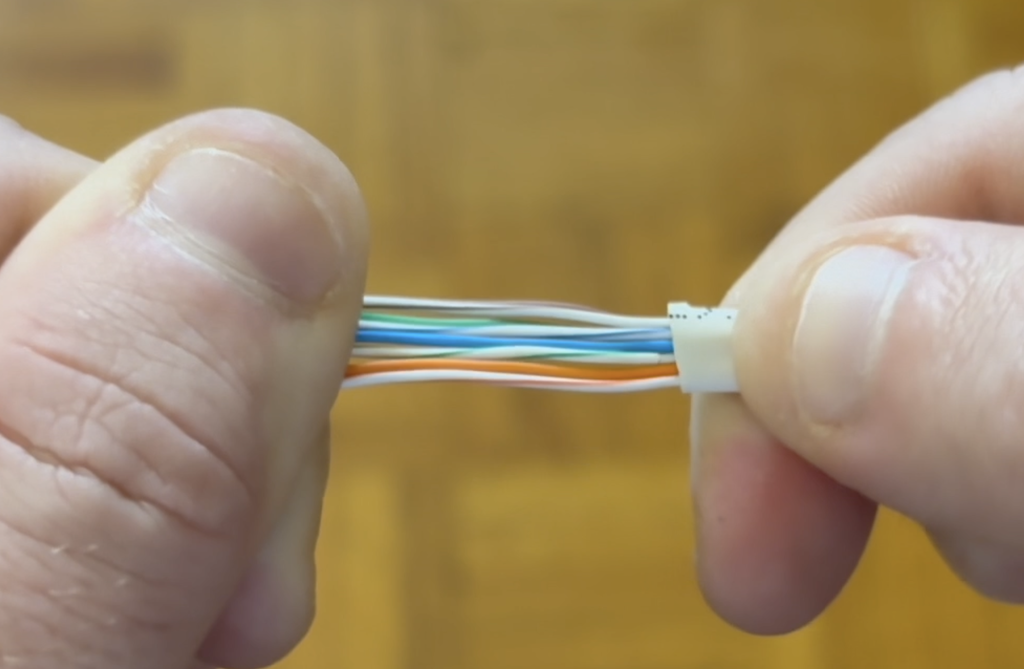
Step 3: Untwist and Arrange the Wires
Inside the jacket are four twisted pairs of wires (8 total). Untwist the pairs and straighten them.
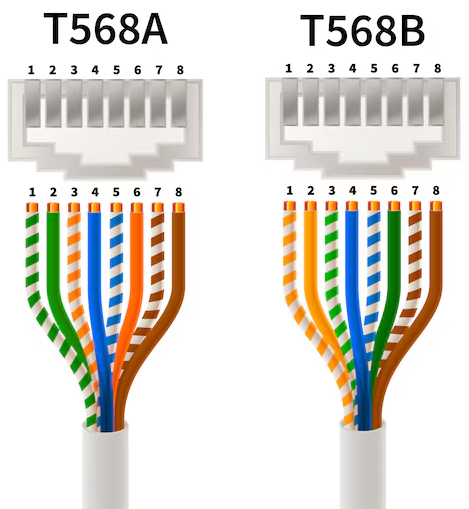
Then, arrange them in either T-568A or T-568B wiring order. Use the same standard on both ends.
T-568A Wiring Order:
- White/Green
- Green
- White/Orange
- Blue
- White/Blue
- Orange
- White/Brown
- Brown
T-568B Wiring Order (Most Common in North America):
- White/Orange
- Orange
- White/Green
- Blue
- White/Blue
- Green
- White/Brown
- Brown
Lay the wires flat and keep them in the correct order. Finally, flatten them gently with your thumb for easier insertion.
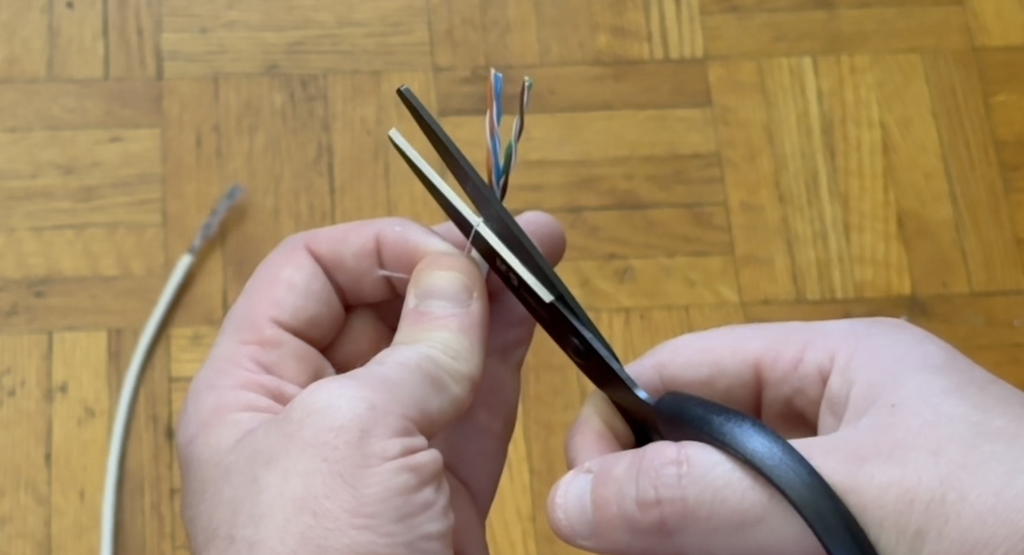
Step 4: Trim Wires to Length
For non-passthrough connectors, trim the wires so that they are just long enough to reach the end of the connector when inserted. Cut them evenly so they line up perfectly.
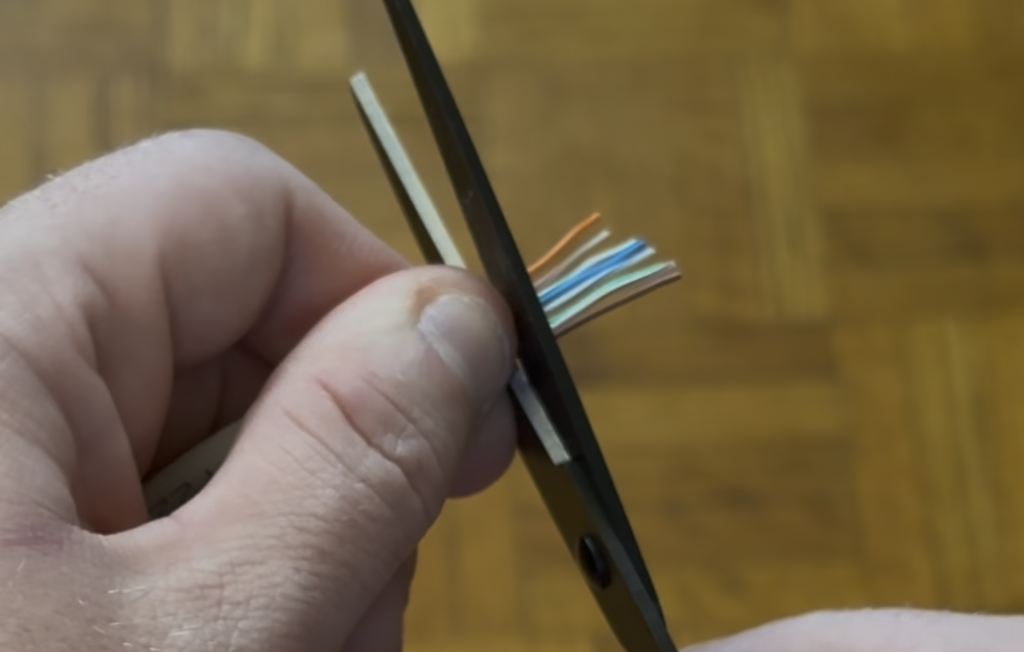
For passthrough connectors, leave them a bit longer since the ends will protrude and be trimmed after crimping.
Step 5: Insert Wires Into the RJ45 Connector
Slide the wires into the connector carefully, ensuring they remain in the correct order. Push firmly until:
- Each wire reaches the very end of the connector.
- The outer jacket passes the strain relief tab for a strong connection.
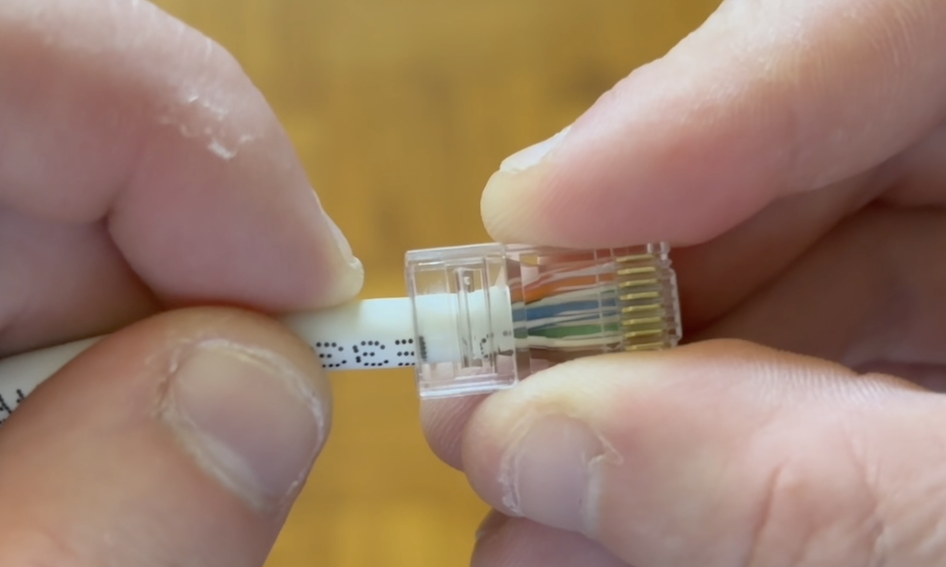
For passthrough connectors, the wires should stick out slightly from the other side.
As soon as you confirm the order, you’re ready to crimp.
Step 6: Crimp the Connector
Place the connector into the crimping tool and squeeze firmly until the pins press down into the wires and the strain relief tab locks onto the outer jacket.
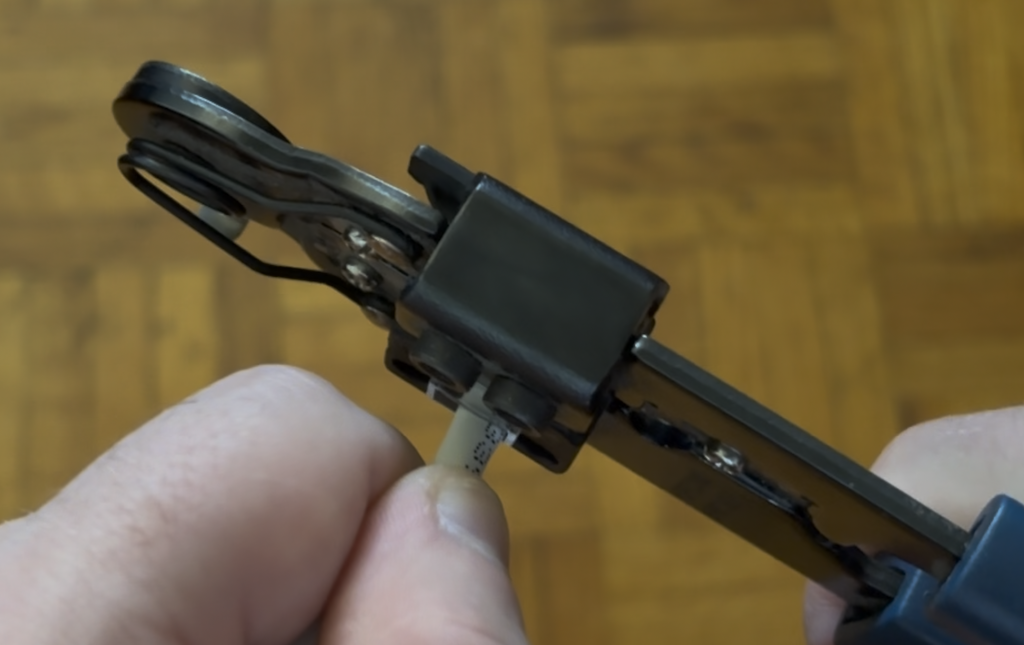
Additionally, for passthrough connectors, trim the wire ends flush with the connector after crimping.
Then, repeat this entire process for the other end of the cable!
Step 7: Test Your Cable
Use a cable tester to confirm that all eight wires are connected in the correct order.
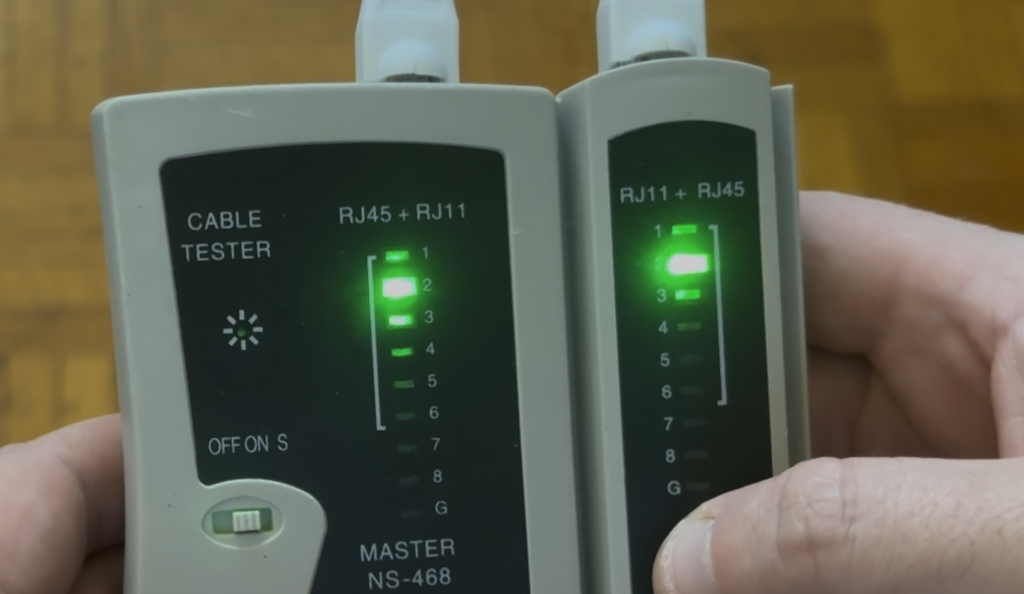
The lights on both ends should flash in sequence.
If any wires are misaligned, cut off the connector and repeat the process on that side.
Once confirmed, your custom ethernet cable is ready for use!
Cat6 vs Cat6a vs Cat5e: Which Should You Choose?
Not all Ethernet cables are created equal. Therefore, here’s a quick comparison to help you decide:
| Category | Maximum Speed | Maximum Bandwidth | Maximum Recommended Length | Best Use Case |
|---|---|---|---|---|
| Cat6 | Up to 1 Gbps (10 Gbps up to 55m) | 250 MHz | 100 m | Home and small office networks, gaming, streaming |
| Cat6a | 10 Gbps up to 100m | 500 MHz | 100 m | High-performance networks, data-heavy tasks, future-proofing |
| Cat5e | 1 Gbps | 100 MHz | 100 m | Budget builds, basic home networking |
Recommendation: Use Cat6 for most home setups, Cat6a if you want to future-proof or need maximum performance for longer runs, and Cat5e only if you already have it on hand or are working with very low-cost builds.
Frequently Asked Questions
Q: Can I mix T-568A on one end and T-568B on the other?
A: Only if you are intentionally creating a crossover cable. Otherwise, use the same wiring standard on both ends.
Q: How long can an Ethernet cable be?
A: Standard twisted-pair Ethernet cables (Cat5e, Cat6, Cat6a) are rated for up to 100 meters (328 feet) in total length. This includes patch cables at both ends. Beyond this length, you may experience signal loss or reduced speeds.
For 10 Gbps on Cat6, keep runs under 55 meters; use Cat6a for longer 10 Gbps runs.
Q: Do I really need a cable tester?
A: While optional, it saves time and frustration by catching miswires before you plug into your network.
Q: Should I ever use CCA cable?
A: No. Instead, always use solid copper cable for performance, safety, and compliance with Ethernet standards.
Troubleshooting Common Issues When Making Ethernet Cables
- Tester Shows Miswired Pair: Re-check wiring order on both ends, re-crimp if needed.
- Cable Doesn’t Click Securely: Ensure the strain relief tab is pressed down properly during crimping. Also ensure that the release tab covers on your strain relief boots aren’t too stiff and pressing down on the release tabs of the RJ45 connectors as a result. You may want to work the rubber of the strain relief boots with your thumbs a bit to stretch and break them in.
- Poor Network Speeds: Test on another device and verify that you’re using solid copper cable, not CCA.
Final Remarks
Learning how to make ethernet cables saves money, eliminates clutter, and gives you full control over your network setup. Whether you’re wiring a home office, building a home lab, or just need a few short patch cables, this DIY approach is a game changer.
Practice a few times and you’ll be making professional-quality network cables in minutes!
If you prefer a video guide, you can watch my video guide below.


Leave a Reply