
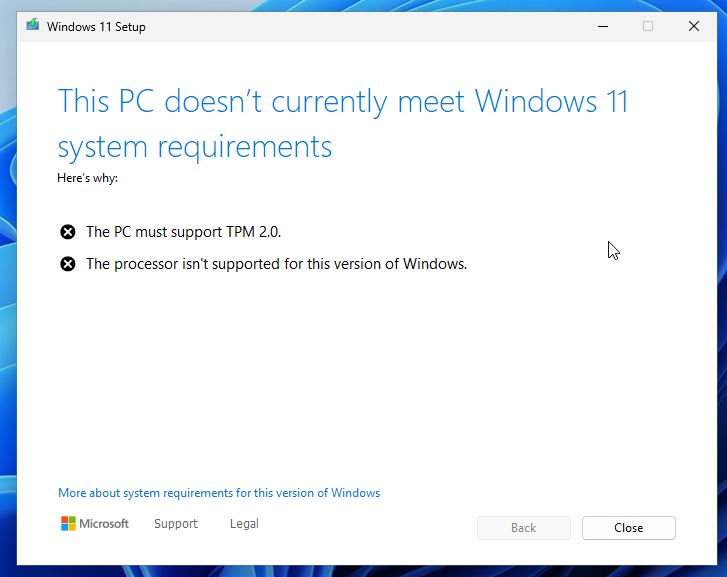
If you’ve installed Windows 11 22H2 or 23H2 on unsupported hardware, you won’t receive automatic updates to 24H2 or later versions through Windows Update. Furthermore, attempting to upgrade from Windows 11 23H2 to 24H2 on unsupported hardware may result in an error:
Fortunately, there’s a workaround for this error that allows you to upgrade without performing a clean install. With this method, you can keep all your files, apps and settings intact.
Warning: This method is not officially supported by Microsoft and may stop working at any time. Proceed at your own risk.
Upgrading Windows 11 23H2 to 24H2 on Unsupported Hardware Steps
To bypass this error, we’ll pass a special flag, /product server, to the Windows installer. This flag will bypass the hardware checks and let us upgrade to the newer version without losing our apps and settings.
1. Download the Windows 11 24H2 ISO Image File
Download the Windows 11 24H2 ISO directly from Microsoft from the bottom of the official Microsoft Windows 11 download page. Select Windows 11 from the drop-down menu and select your language before clicking Confirm to download the ISO file.
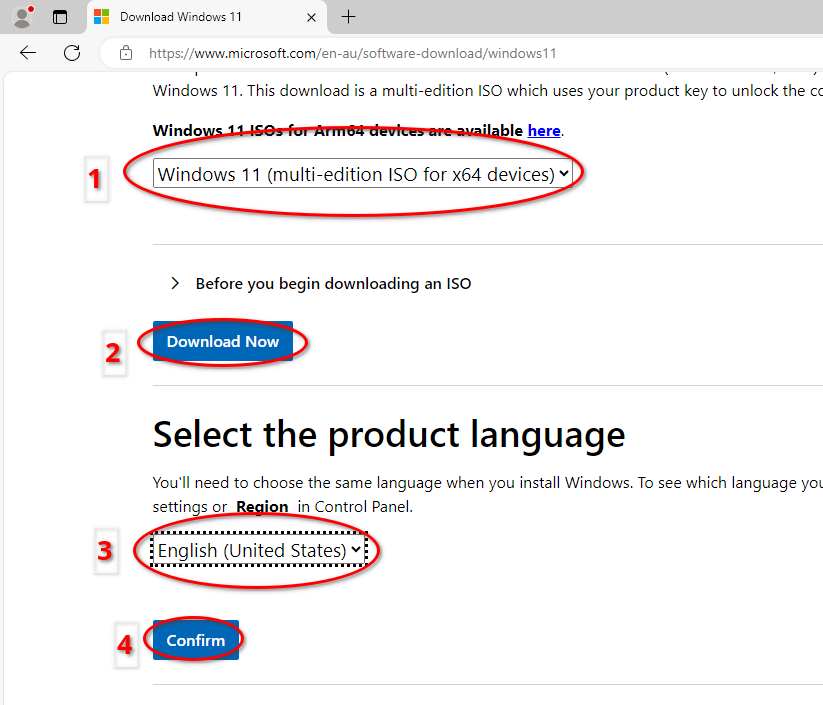
Evidently this will download the Windows 11 24H2 image, or whatever latest version of Windows 11 is available.
2. Mount the ISO Image
Mount the ISO image that was just downloaded by right-clicking it, then, clicking Mount.
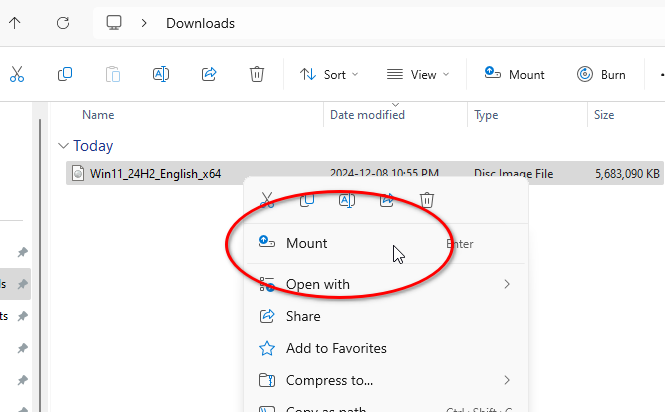
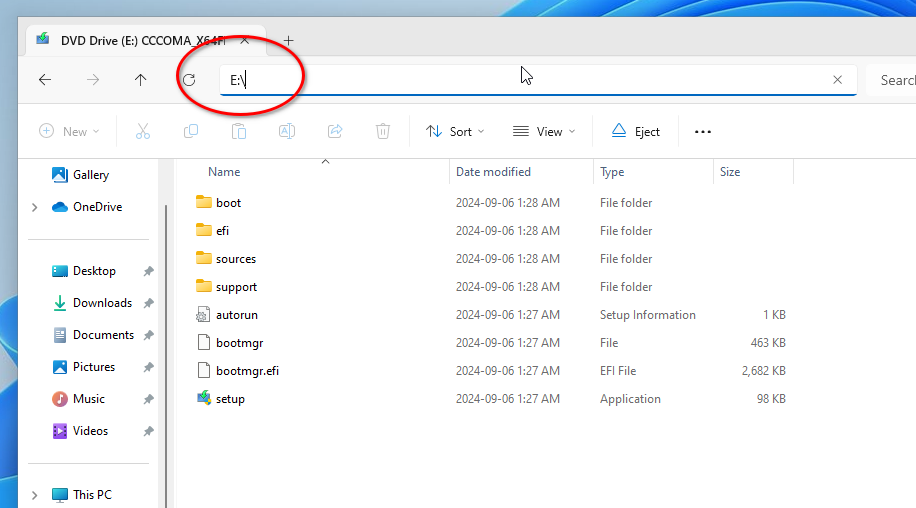
The mounted image will open in a new explorer window. Take note of the drive letter, which you will need for the next step. In my case, this was E:.
3. Open an Elevated Command Prompt
Open an elevated Command Prompt window by clicking Start, searching for cmd, right-clicking Command Prompt and clicking Run as administrator.
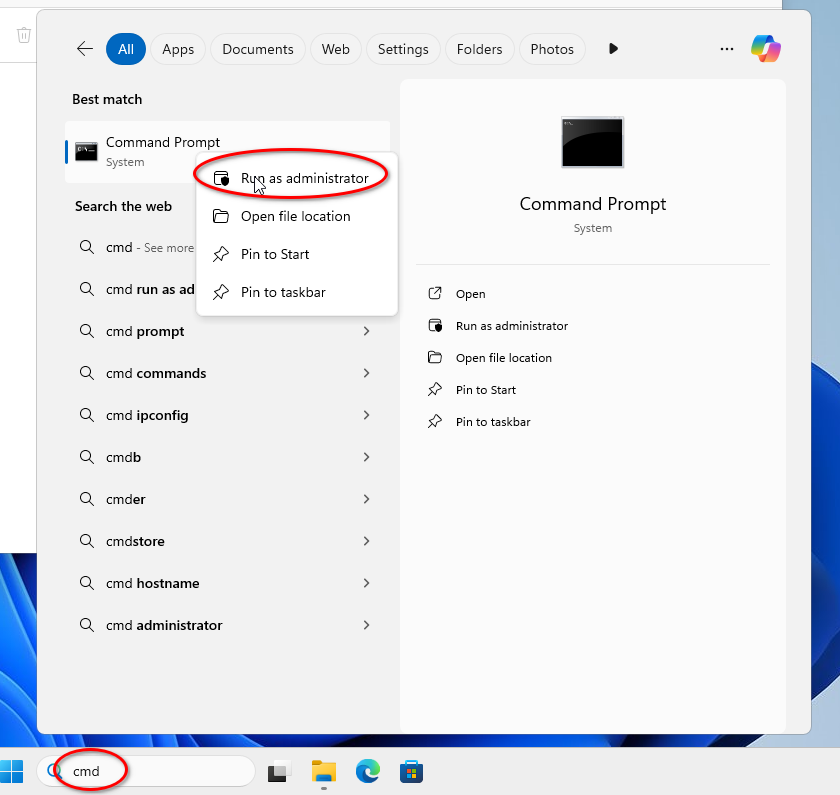
Then, click Yes on the User Account Control popup.
4. Run setup.exe with the “server” Product Flag (/product server)
Start the Windows 24H2 11 setup by typing E:setup.exe /product server and pressing Enter.
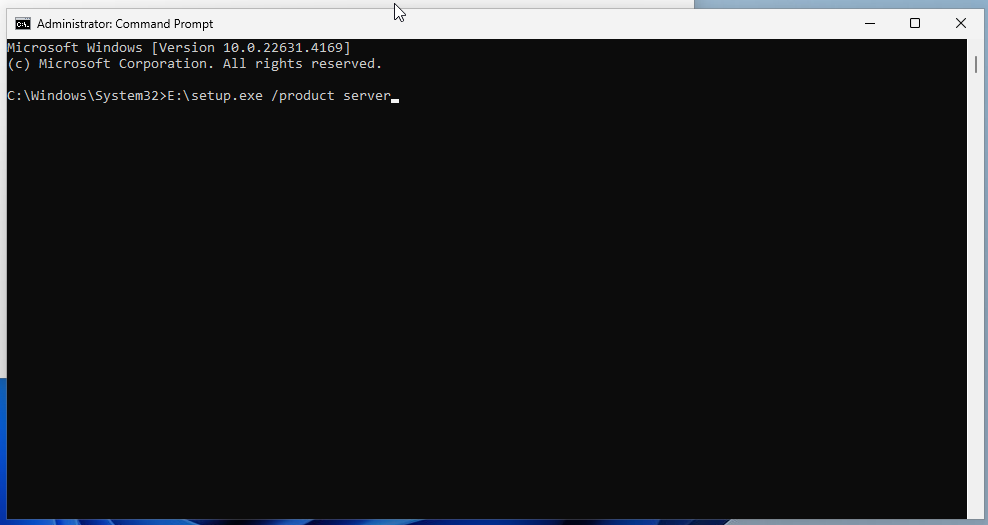
Make sure to replace E: with your drive letter from step 3.
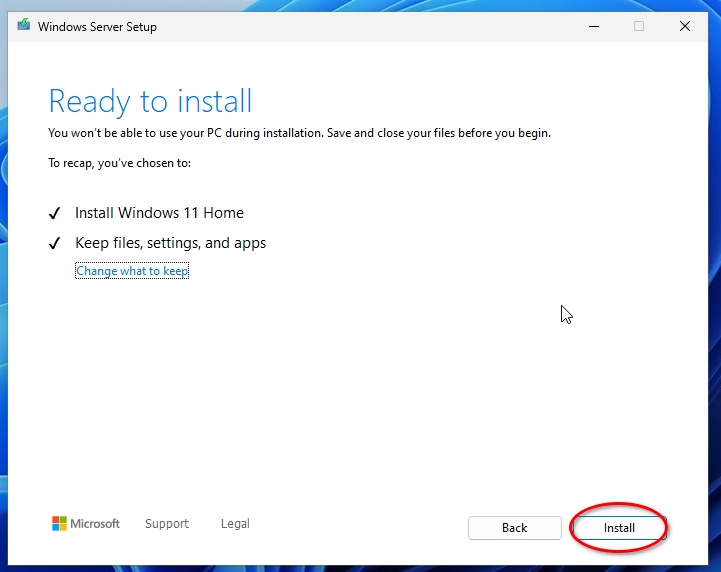
The Windows setup will open. Note that labels throughout the installer will refer to the installation of Windows Server. This is because of the flag we passed earlier, but rest assured we’re still installing Windows 11, not Windows Server.
5. Click Next Through the Installation Wizard
You can simply click Next through the installation wizard. By default, it will be set to keep all your files, settings and apps. Lastly, click Install.
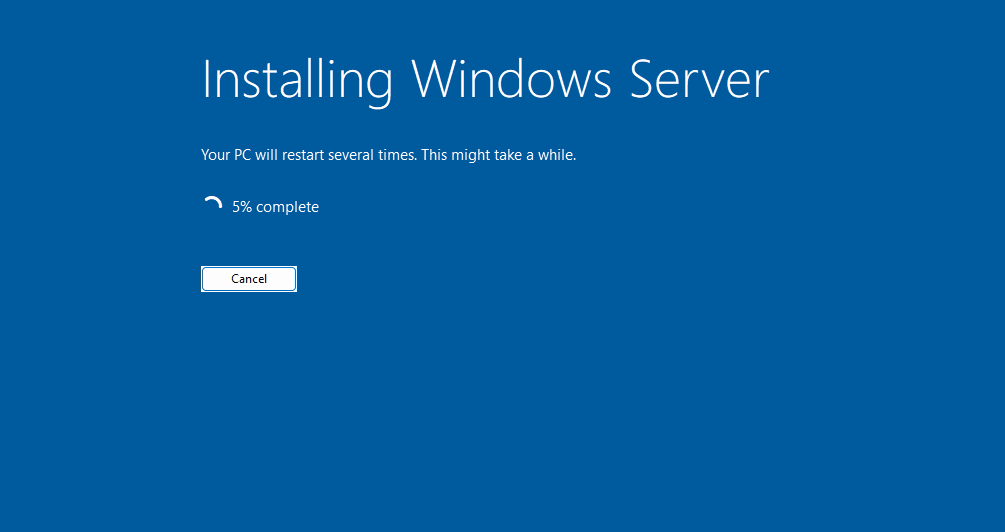
You’ll get a blue screen that says Installing Windows Server. Nonetheless, don’t panic, it’s installing Windows 11!
6. Complete Windows 11 23H2 to 24H2 Upgrade on Unsupported Hardware
After waiting several minutes (or even hours on older machines), and after several reboots, you should be back at the login screen and able to sign back in.
That’s it! As long as the update was applied successfully, you will be running Windows 11 24H2.
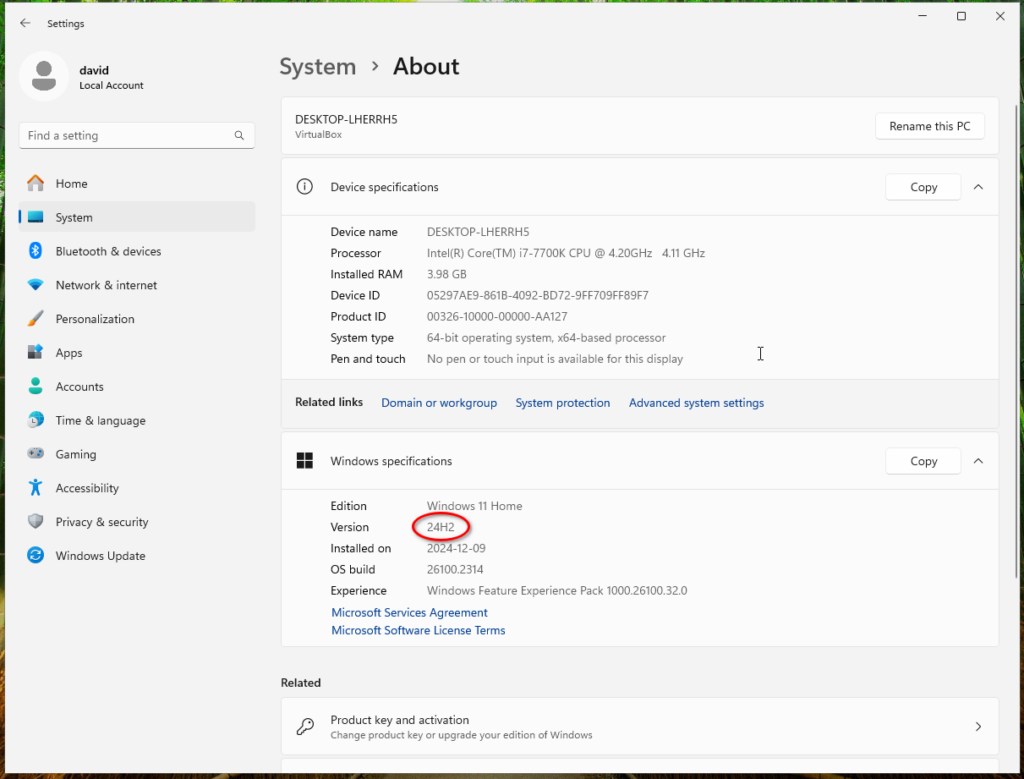
Afterward, you can double check you’re running the 24H2 update from the Settings app:
Remarks
- This method works because Windows Server uses the same installer as Windows 11, but Windows Server doesn’t have the same hardware restrictions as Windows 11. By tricking the installer with the product flag, we can bypass the hardware check and install Windows 11.
- This should work for upgrading from Windows 11 22H2 as well, and with future versions of Windows 11 higher than 24H2.
- You can also use PowerShell or Terminal instead of Command Prompt.


Leave a Reply