
I had been using pfSense Community Edition on my home router and firewall for years without any problems. In fact, it served me very well for several years. But after using OPNsense at work, I decided it was time to migrate my router/firewall away from pfSense to OPNsense.
OPNsense was forked from pfSense in 2015. The development team actively updates it and has given it a modern UI. Over time, OPNsense has deviated from pfSense and matured into its own operating system, led by its own team of developers and decision-makers. This makes it similar to, but not identical to pfSense.
As such, migration does require some planning, since not everything in OPNsense is identical to pfSense.
Motivations for Migrating from pfSense to OPNsense
pfSense was great and modern when I first started using it, but over the years it became very clunky. Updates to the Community Edition also seem to have slowed. The interface is dated. There was also a bit of a scandal with their original WireGuard implementation. This left a bit of a bad taste for me, considering I already used OpenVPN frequently through pfSense and would have liked to setup WireGuard as well.
Unfortunately, because OPNsense has deviated from pfSense so much, there is no direct way to migrate from pfSense to OPNsense. This means you must port pretty much all configuration manually. This may or may not be a big deal, depending how much you rely on services running on your pfSense box.
Planning the Migration
In my case, I relied on my pfSense box for the following services:
- Router
- Firewall
- Squid caching HTTP proxy
- HAProxy reverse proxy for many services, both internal and external
- OpenVPN
- WireGuard
- ACME Client (SSL Renewal)
I needed to port the configurations of each service to OPNsense. I also had a few (loose) requirements for the migration:
- The migration shall appear transparent to all other clients on the network.
- Behaviour of services shall remain unaffected before and after the migration.
- Clients shall not have to do any reconfiguration.
- There shall be minimal downtime, ideally less than 30 minutes. My household loves our internet!
Migrating from pfSense to OPNsense
These are the steps I took to migrate my pfSense box to OPNsense. You can use this as a guide, but some steps will vary depending on your setup and the tools you have available.
The steps I took involved creating a virtual machine and installing OPNsense, configuring OPNsense in the virtual machine and exporting the configuration as an OPNsense configuration file. This way, I could install OPNsense on my bare metal router box and simply import the configuration, all ready to go.
1. Creating an OPNsense Virtual Machine
To start, I created a virtual machine in Proxmox to simulate my router box. The important thing was to give it 2 network interfaces, so I could simulate the WAN and LAN ports on the physical box.
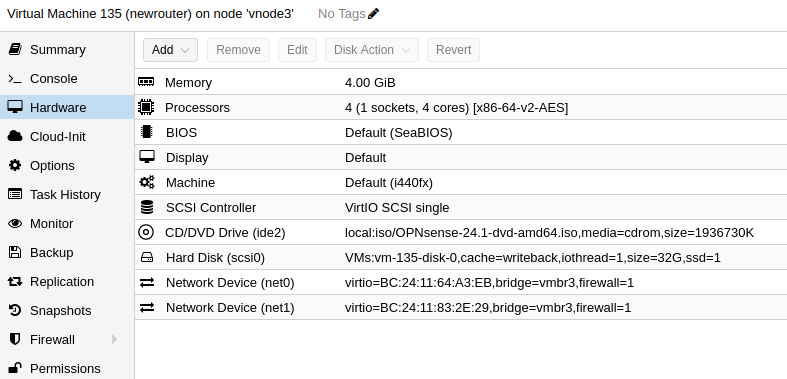
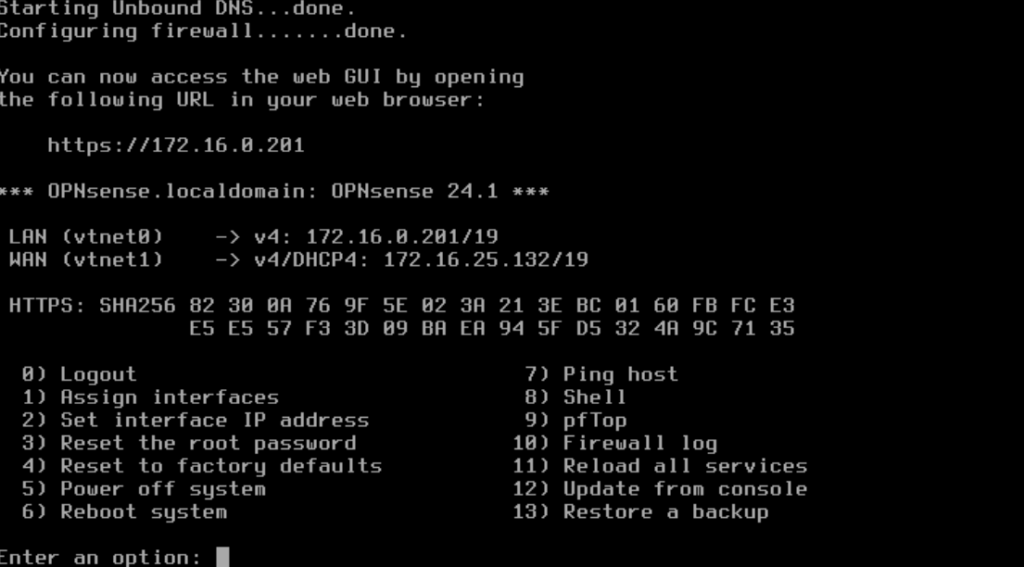
Next, I installed OPNsense in the virtual machine. By default, OPNsense assigns a new subnet on the LAN interface after installation. To access the OPNsense configuration page, I needed to give the LAN interface a static IP address in my current network range.
My pfSense box has an IP address of 172.16.0.1, so I decided to give my OPNsense VM LAN interface an IP address of 172.16.0.201 so I could easily remember it. This interface will eventually take over the IP address of the pfSense box when porting is complete.
2. Using Both Admin Panels to Convert pfSense Configuration to OPNsense Configuration
First, I logged into both my pfSense box at 172.16.0.1, and my OPNsense virtual machine at 172.16.0.201. I checked which external software packages I had installed on my pfSense box and installed the equivalents on OPNsense.
Next, I started going through each relevant pfSense configuration page, finding the corresponding page in OPNsense and manually porting the configuration values. I started with basic network configuration such as hostname and routing, then firewall rules, and finally external software packages.
This was a long and tedious process with so much network configuration and so many service configurations to port. Since OPNsense is a fork of pfSense after all, a lot of the configuration pages are almost identical, but with a new look.
However, there were some notable mentions where the configuration pages did differ quite a bit and I had to figure out the equivalent configuration from pfSense to OPNsense. This was especially true for HAProxy, which I left until last, since I knew it would be the biggest pain.
I’ll outline my general experience with each configuration and service I ended up porting.
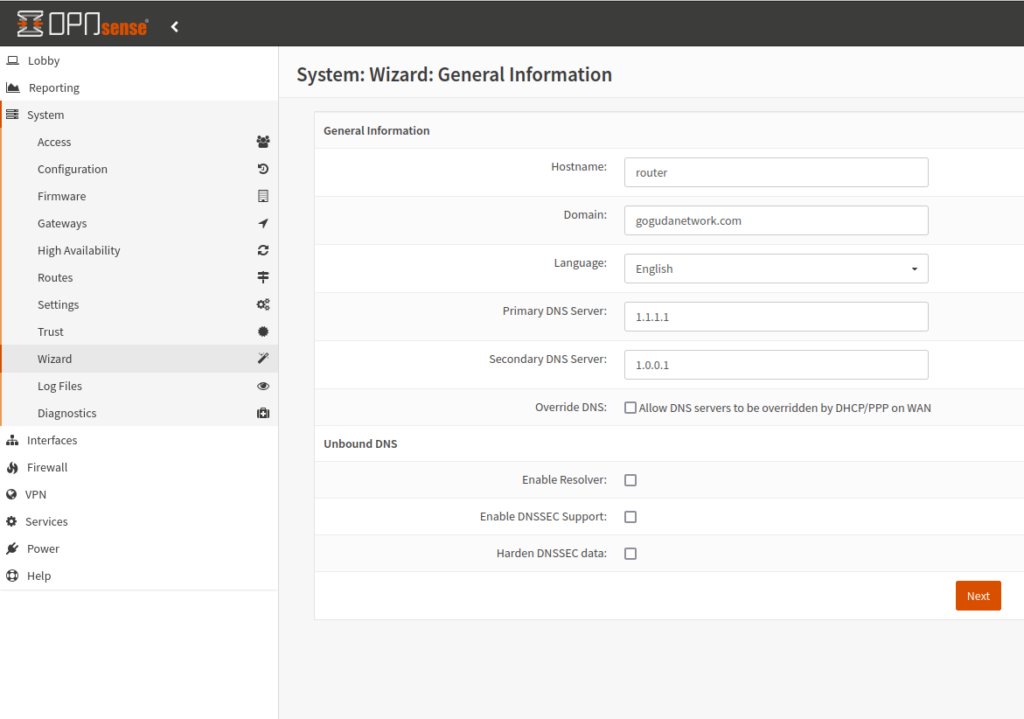
2.1. Hostname, Interfaces, DHCP, Routing & Firewall
These categories were super easy since the structure of the configuration pages for hostname, interfaces, DHCP, routing and firewall are almost identical between pfSense and OPNsense. I set the hostname, turned off DHCP (I have another DHCP server on my network), recreated all static routes in my route table (which weren’t many), and recreated all firewall rules (again, not many).
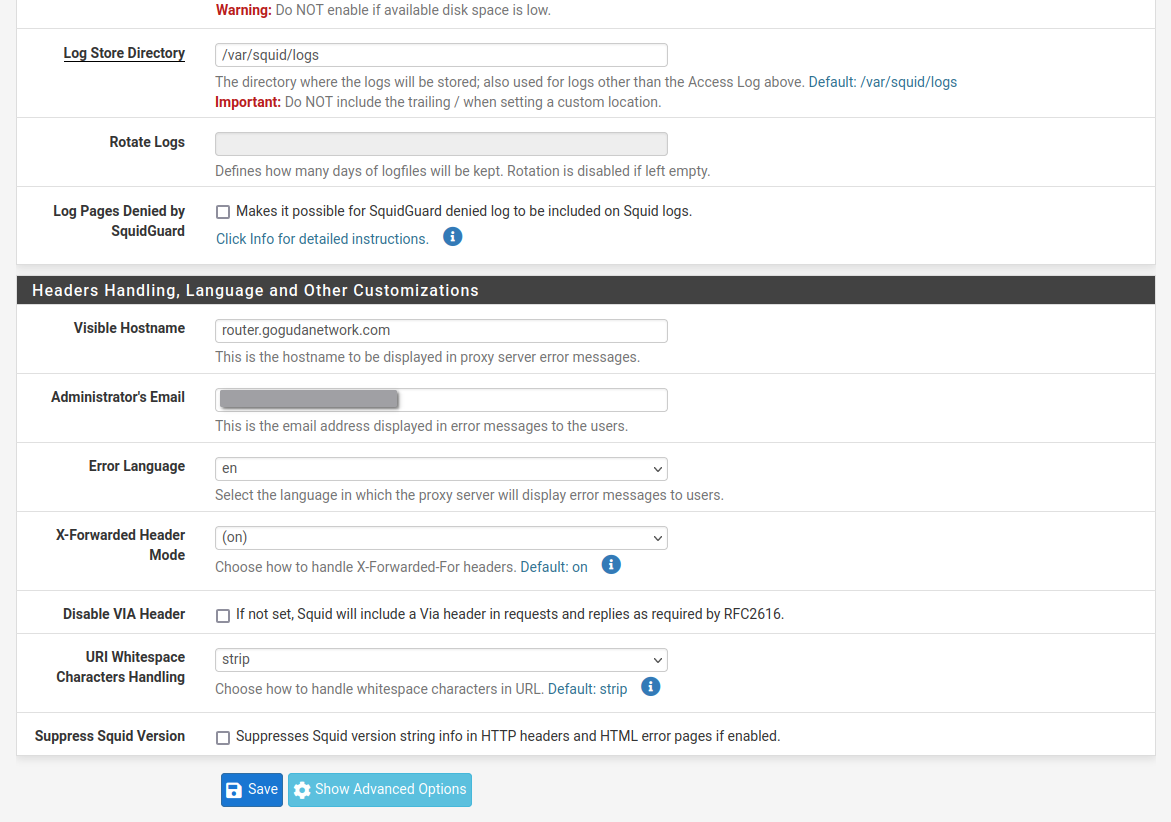
2.2. Squid Caching HTTP Proxy, WireGuard, OpenVPN and ACME Client
This category of configurations was relatively easy to port as well, with the only caveat being that some of the options were separated into different tabs and hidden under an Advanced flag. Still, they were all pretty easy to work with.
The WireGuard page was notably slightly different, mostly due to the scandal I mentioned above, but the equivalent options were easy enough to find.
2.3. HAProxy Reverse Proxy
This one was the biggest pain. I had about 20 different services running through this proxy using pfSense. The way HAProxy is configured on pfSense is totally different from the way it’s configured on OPNsense. My configuration on pfSense was already pretty elaborate.
The OPNsense HAProxy configuration does a better job of separation of concerns over pfSense’s implementation. Different pages are used for rules and checks, whereas these are defined with your frontend configuration in pfSense.
This also did make configuration on OPNsense a bit more tedious, but a lot cleaner in the long run. Overall, I spent about an hour porting everything and making sure it worked correctly.
2.3.1. Testing the HAProxy Configuration
Testing the services proxied by HAProxy and making sure SSL worked correctly was also a bit of a pain, but since I run Linux I was able to temporarily edit my /etc/hosts file to point to 172.16.0.201, the LAN IP of my OPNsense VM, for whichever service I was testing as I ported each one.
If you do this, just make sure you are familiar with /etc/hosts and know what you’re doing.
3. Exporting the OPNsense Configuration File
Finally, I exported the OPNsense configuration file, saved it to my computer and my USB drive (just in case) and shutdown the virtual machine.
At this point, I also exported my pfSense configuration file, just in case something was to happen and I had to quickly revert to pfSense for the time being.
It’s important to note that these two files are not interchangeable and it’s important not to mix them up.
4. Installing OPNsense on my Hardware Router Box
I added the OPNsense ISO to my Ventoy USB and booted the installer on my hardware router box. After installation, I gave the router LAN address an IP address of 172.16.0.1, the same IP address that the router was assigned when it ran on pfSense.
5. Applying the New OPNsense Configuration
Next, I went to back to my computer and went to the OPNsense configuration page at 172.16.0.1. From there, I simply applied the configuration file I had downloaded to my computer earlier, gave it a moment and logged back into the OPNsense configuration page at 172.16.0.201.
Note that the IP address I’m using to login is still the IP address I assigned the LAN interface in the VM, because that’s what it was in the exported configuration file.
I changed the LAN IP address to 172.16.0.1 from the configuration page and rebooted.
After a few minutes, I went to the admin page at the new IP address of 172.16.0.1. I just needed to manually install all the packages in the OPNsense VM from the plugins page. The UI highlights the missing plugins, allowing you to easily reinstall them.
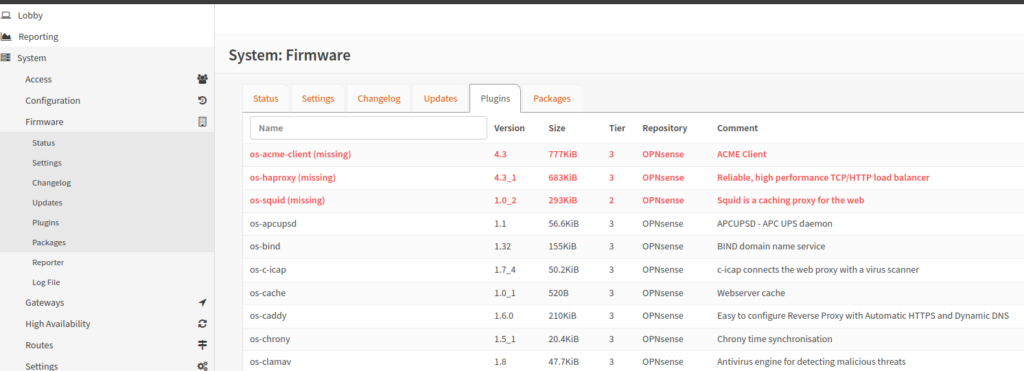
Thankfully the configuration for all these plugins is saved in the OPNsense configuration file, so I gave the router one last reboot to make sure everything was up and running correctly.
6. Fully Testing the Migration of pfSense to OPNsense
That was it! We had internet access. I was able to access all my internal HAProxy services with SSL working using the original URLs as expected.
To test external HAProxy services, WireGuard and OpenVPN, I used my data connection on my phone. All were working as expected.
Conclusion
All in all, it took me about 2 hours to port all the configuration from pfSense to OPNsense manually using the admin panels, and then about 20 minutes of internet downtime to install OPNsense and restore the configuration file on my bare metal router box. Not bad! It’s not a hard process once you figure out a good plan, just tedious.
I also suggest you pick OPNsense over pfSense Community Edition for a new build, since it’s much more modern and updated more regularly.
Remarks
- I used Proxmox for my OPNsense virtual machine used to create my configuration, but you can do the same thing with VirtualBox or Hyper-V.
- If you’re having trouble accessing the OPNsense administration page after restoring your configuration file on your router box, you should try both the IP address you assigned in the VM, and the IP address you assigned via the console upon first boot on your actual hardware (
172.16.0.201and172.16.0.1in my case, respectively). - If you were wondering about the hardware in my router box, it’s made from some old PC parts mounted in a server rack: an AMD A8-6600K CPU, 8 GB of RAM and a 120 GB SSD with an Intel dual NIC. Nothing fancy by today’s standards, but even so it’s still a bit overkill for this purpose.


Leave a Reply