
Creating a local account on Windows 11 upon first setup is becoming increasingly difficult. Thankfully, you can still create one on Windows 11 Pro and Windows 11 Enterprise during initial setup if you don’t want to link your PC to a Microsoft account.
Unlike Windows 11 Home, these versions of Windows 11 still give you the option upon first setup, albeit somewhat hidden behind the “domain join” option.
Creating a Local Account During Windows 11 Pro & Enterprise Setup
To create a local account during Windows 11 Pro or Enterprise setup, follow the initial setup wizard.
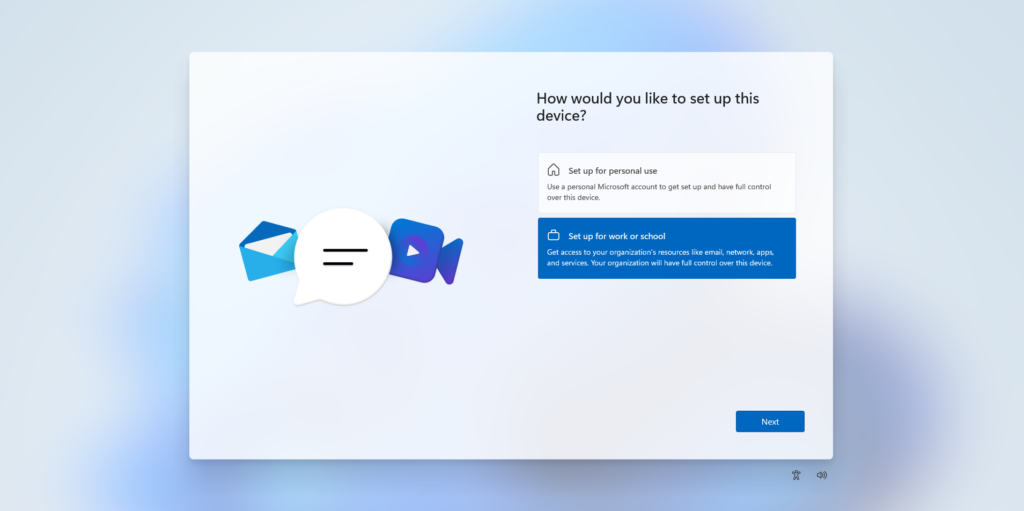
1. Follow Initial Wizard, Select “Set up for work or school”
You will eventually get to the following screen, which asks how you would like to set up your device. Select the Set up for work or school option and click Next.
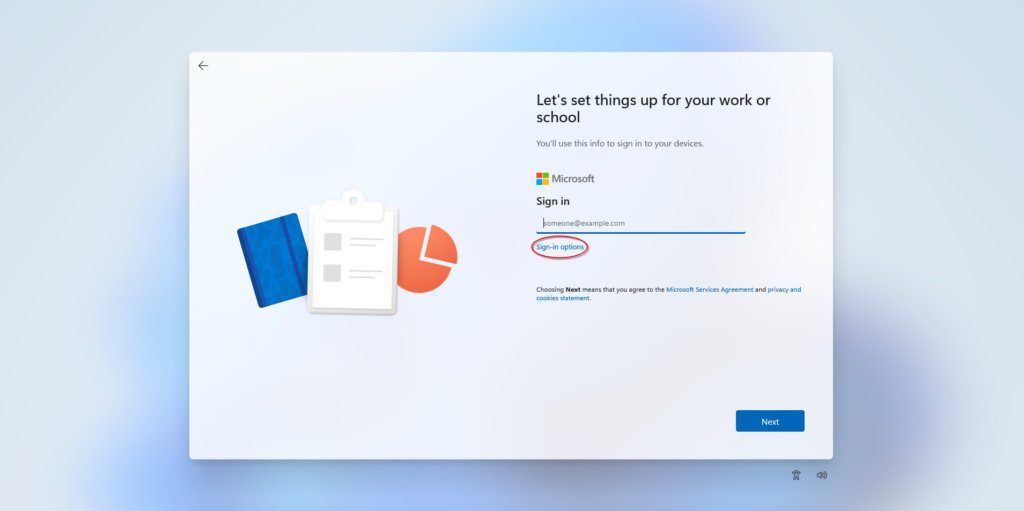
2. Click “Sign-in options” When Asked to Sign in
You’ll get to the following screen, which asks you to sign in with a Microsoft account. Click the Sign-in options text.
3. Select “Domain join instead”
On the next screen, click the Domain join instead option.
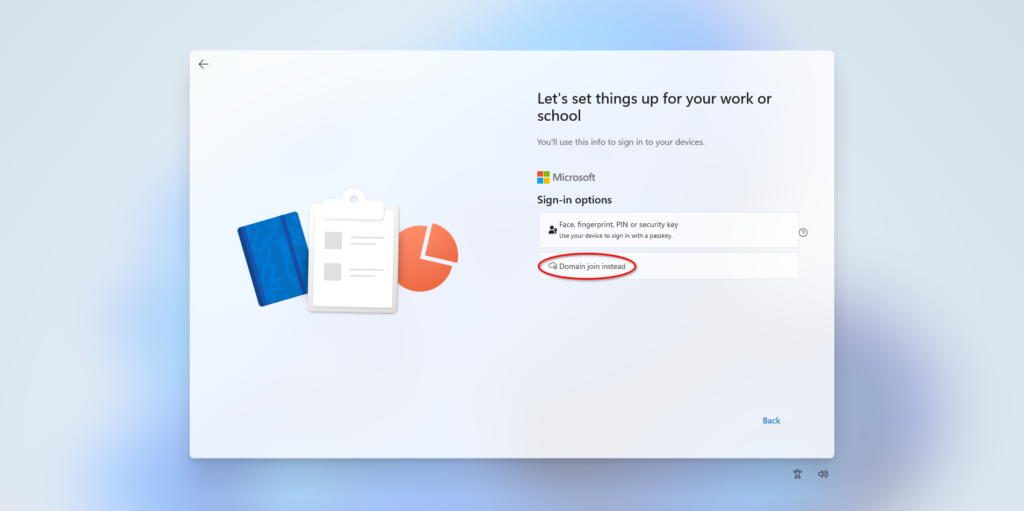
This option is a bit misleading (probably on purpose). You don’t need to join a domain, but you do need to select it to create a local account on Windows 11 Pro or Windows 11 Enterprise.
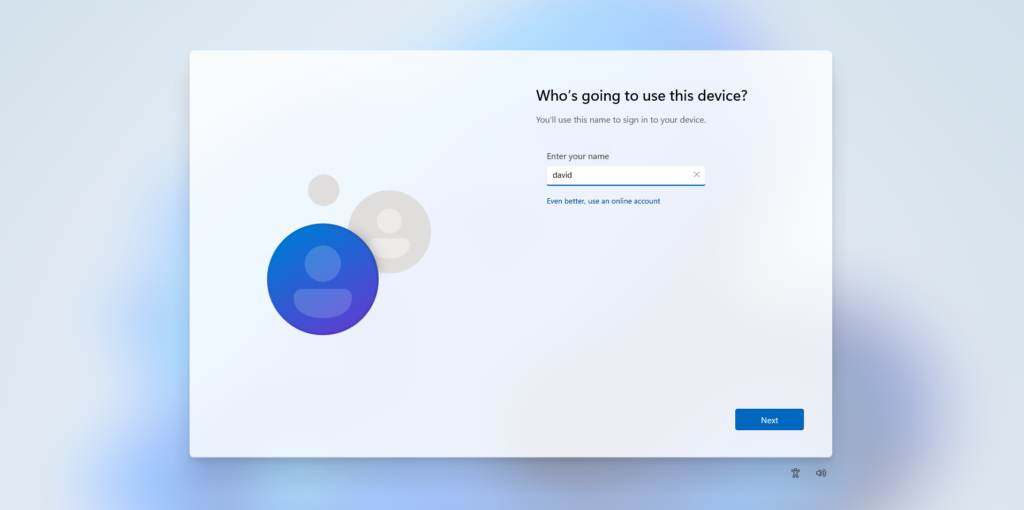
4. Create a Local Account
Type a username, create a password, and you’re done!
Remarks
- This only works for Windows 11 Pro and Windows 11 Enterprise editions. To create a local account on Windows 11 Home, the steps are a bit different and more complicated.
- If you’re not sure which edition of Windows 11 your computer is running, it’s most likely Windows 11 Home and you should follow this guide instead.


Leave a Reply