
If you have recently set up a new computer with Windows 11, you probably noticed that you can no longer choose a local account instead of a Microsoft account. Previous workarounds, such as entering an invalid email address or disconnecting the internet, no longer seem to work.
There are benefits to using a Microsoft account with your PC, but you might still want to use a local account. Some people prefer using a local account for administrative or privacy reasons. Also, you can always sign-in to a Microsoft account at a later time.
You can still create a local account during initial setup, but it’s harder than before. Here are the steps for skipping Microsoft account login and creating a local account in newer versions of the Windows 11 Home out-of-box setup experience.
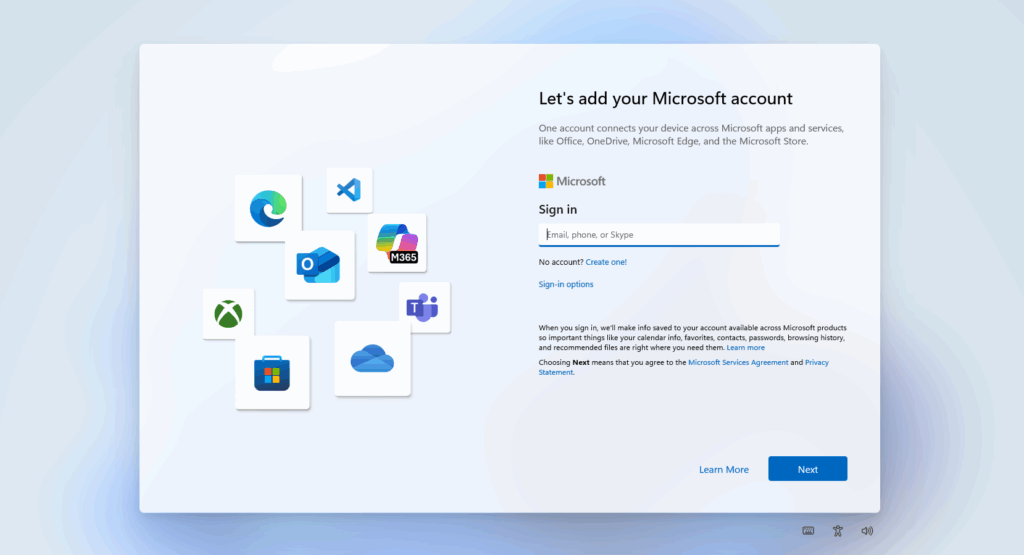
1. Proceed Through Initial Setup Until the Microsoft Account Screen
Proceed through the initial setup steps by configuring the options and clicking Next. You’ll eventually wind up at the Microsoft account screen.
2. Open Command Prompt from Setup with SHIFT+F10
Once you’re in the initial setup wizard shown above, press SHIFT+F10 on your keyboard. This will open a command prompt window.
3. Type start ms-cxh:localonly and Hit Enter
Click inside of the command prompt window and type start ms-cxh:localonly.
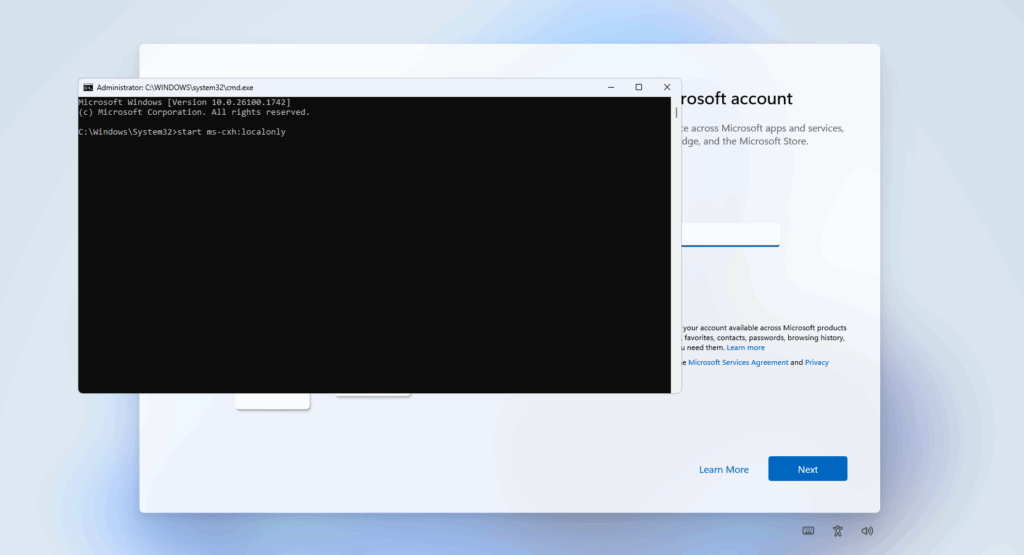
Hit Enter.
4. Create a Local Account
A new screen will open to create a local account. Type a username, password and choose your security questions.
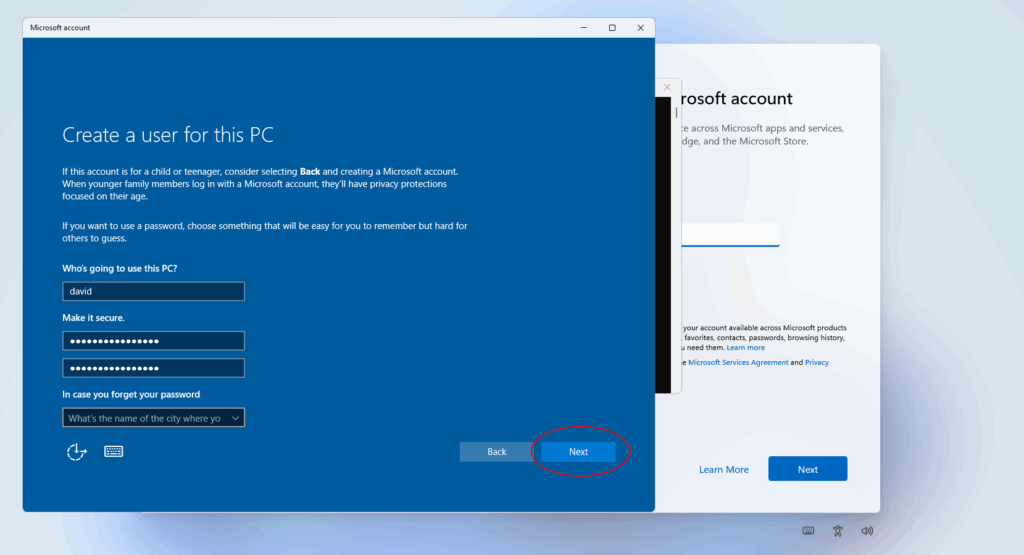
When you’re done, simply click Next to proceed to the desktop as you normally would!
Remarks
- Although you can technically run this command at the beginning of setup, it’s best to get to the Microsoft account screen first to easily configure your system’s region, keyboard settings and network.
- As of right now, you can still create a local account on Windows 11 Pro and Enterprise versions from the setup wizard.
- My opinion is that this clearly shows the direction Microsoft is taking with its consumer line of products. They want us to be reliant on their cloud as much as possible!
Update 05/08/2025: The command previously suggested in this article, oobe\bypassnro, has been disabled by Microsoft as of Windows 11 build 26100. Only the start ms-cxh:localonly command should be used going forward.
If you prefer a video to follow along, you can watch the tutorial on my YouTube channel down below:


Leave a Reply