I decided to install Home Assistant on Proxmox instead of running it on a dedicated Raspberry Pi or another physical computer. Since I already had a Proxmox server running in my homelab, giving Home Assistant OS its own virtual machine made more sense and let me manage it alongside my other VMs.
These are the steps I used to install Home Assistant on Proxmox. I chose to install the full Home Assistant Operating System (HAOS) rather than running Home Assistant in a regular Linux VM or LXC container.
Home Assistant provides an official KVM/Proxmox .qcow2 disk image specifically for this type of installation. The process is slightly different from installing a normal operating system from an ISO because we import this prebuilt disk image into Proxmox instead.
I based part of my process on this community guide rather than using one of the automated helper scripts.
Before Installing Home Assistant on Proxmox
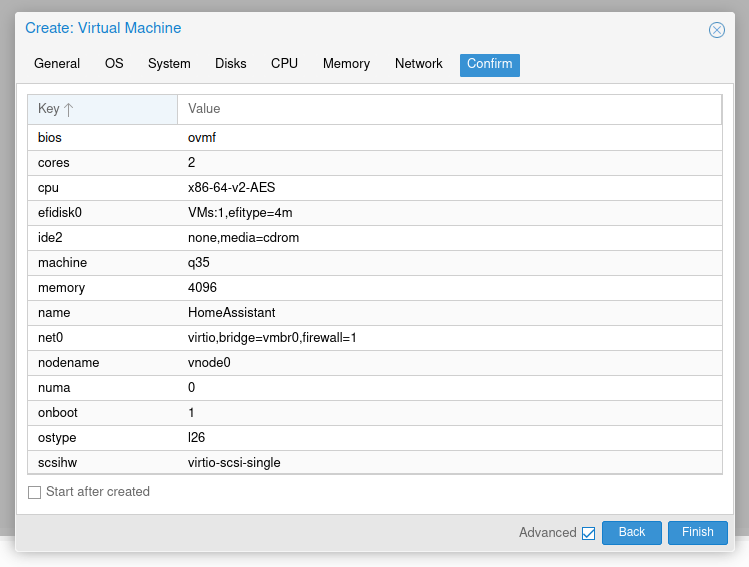
For my Home Assistant VM, I used:
- 2 CPU cores
- 4096 MB (4 GB) RAM
- q35 machine type
- OVMF (UEFI) BIOS
- Home Assistant’s KVM/Proxmox QCOW2 image
- The default Proxmox network interface
Home Assistant’s official documentation currently lists a minimum of 2 vCPUs and 2 GB of RAM for a virtual machine. I decided to give mine 4 GB of RAM instead. You can always increase the resources later if necessary.
You will also need access to the Proxmox web interface and shell (either via web or SSH) for the Proxmox node where you want Home Assistant to run.
Steps to Install Home Assistant on Proxmox
1. Get the Home Assistant KVM/Proxmox Image
First, go to the Home Assistant alternative installation page and find the download for KVM/Proxmox.
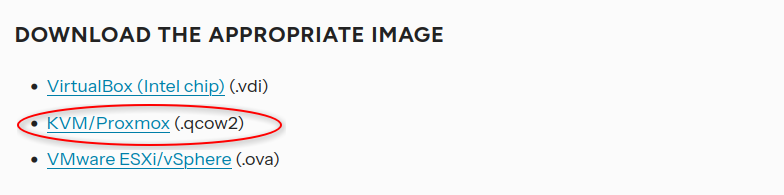
Home Assistant provides this image in QCOW2 format, which is exactly what we need for Proxmox.
Instead of downloading the image to my computer and uploading it again to Proxmox, I downloaded it directly from the Proxmox shell.
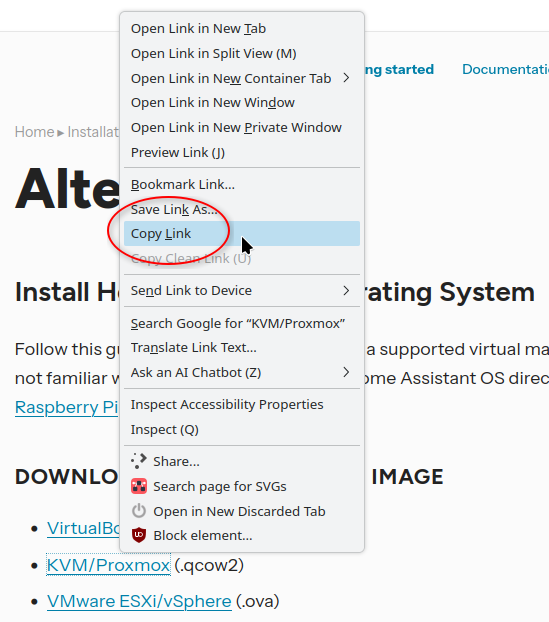
Right-click the KVM/Proxmox download link on the Home Assistant website and copy the link address.
Then, open the Proxmox web interface, select your Proxmox node and open Shell.
Download the file using wget:
wget <HOME-ASSISTANT-QCOW2-UL>
For example, your command will look similar to:
wget https://github.com/home-assistant/operating-system/releases/download/<version>/haos_ova-<version>.qcow2.xz
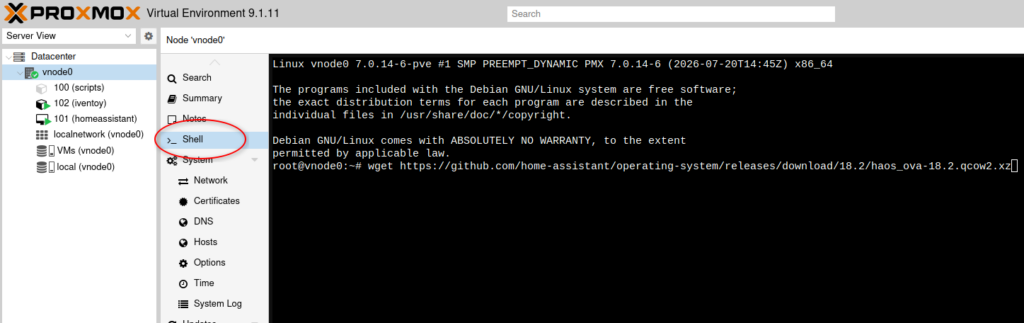
Press Enter after typing the command.
Alternatively, you can SSH into the Proxmox node to run these commands.
I recommend copying the current URL directly from Home Assistant instead of copying an old version number from another guide. That way, you will download the current Home Assistant OS image.
2. Decompress the Home Assistant QCOW2 Image
The downloaded QCOW2 image is compressed using XZ, so we need to decompress it before importing it into Proxmox.
Run:
unxz haos_ova-<version>.qcow2.xz
Replace the filename with the actual filename you downloaded.
For example:
unxz haos_ova-18.2.qcow2.xz
The version above is only an example. Use the filename you actually downloaded.
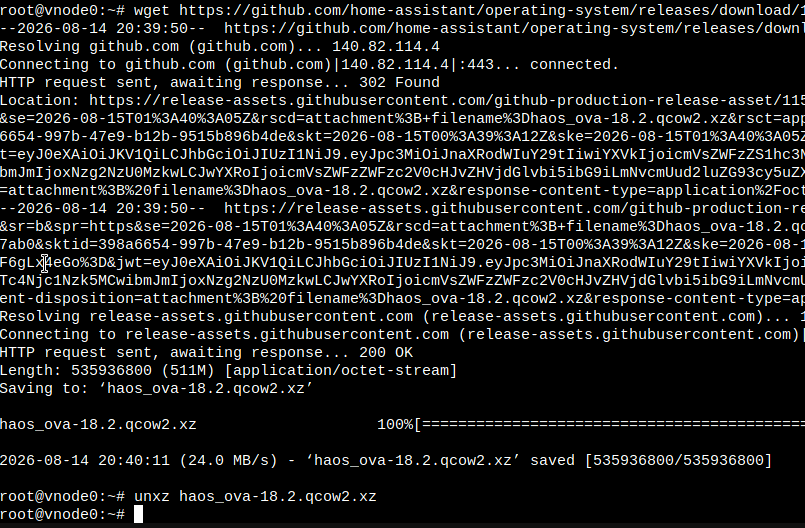
After extraction, you should have a file ending in:
.qcow2
If you aren’t sure which directory you downloaded the file into, run:
pwd
You can also list the files in the current directory with:
ls
If you opened the shell through the Proxmox web interface, you will commonly be working from /root.
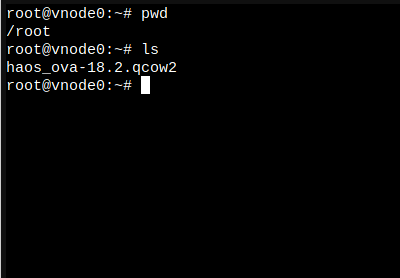
The Proxmox forum guide uses the same wget and unxz process to obtain and extract the Home Assistant image.
3. Create a New Home Assistant VM in Proxmox
Next, go back to the Proxmox web interface and click Create VM.
We are going to create the VM without an installation ISO because the Home Assistant QCOW2 file will become the VM’s boot disk.
General
Give the VM a name such as:
HomeAssistant
Take note of the VM ID. We will need this number when importing the Home Assistant disk later. In my case, this was 103.
In Advanced settings I also enabled:
Start at boot
This way, Home Assistant will automatically start when my Proxmox server starts.
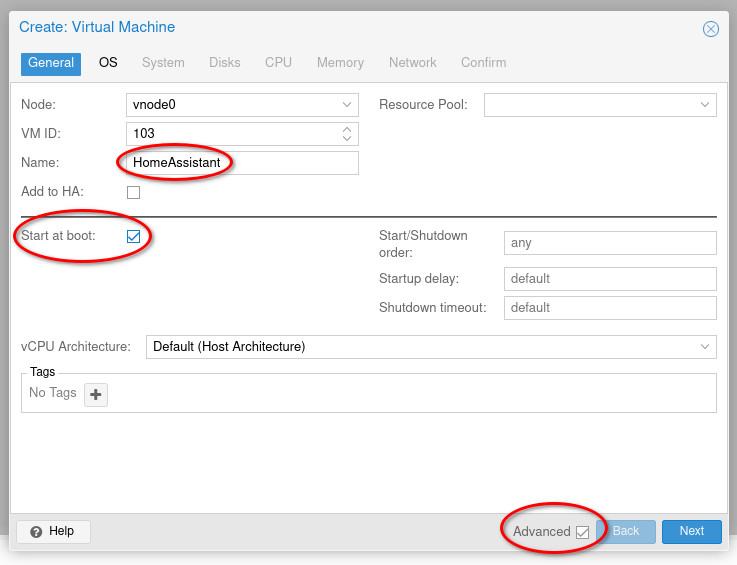
OS
Under the OS tab, select:
Do not use any media
We don’t need an ISO because Home Assistant is already installed inside the QCOW2 image.
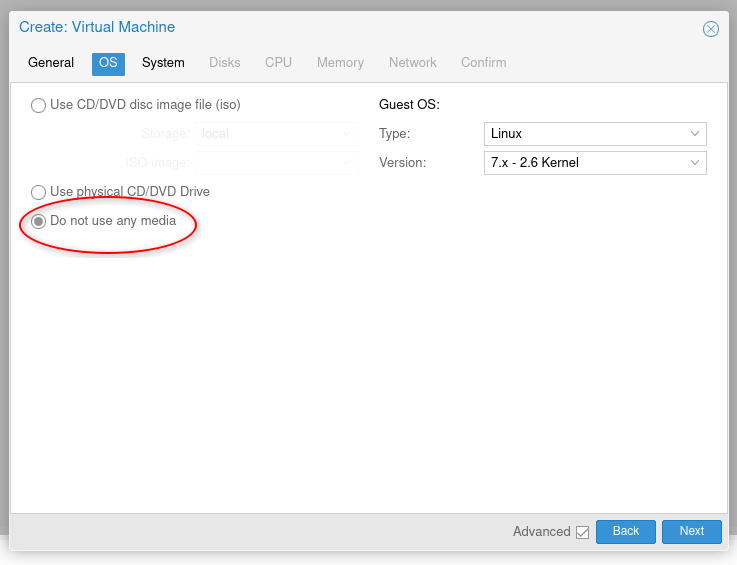
System
This part is important.
For Machine, select:
q35
For BIOS, select:
OVMF (UEFI)
Select a storage location for the EFI disk. In many installations this will be:
local-lvm
In my case it was actually a storage location called VMs.
I also unchecked:
Pre-Enroll keys
Home Assistant requires UEFI when running as a virtual machine, and the referenced Proxmox configuration uses q35 with OVMF and Secure Boot keys disabled.
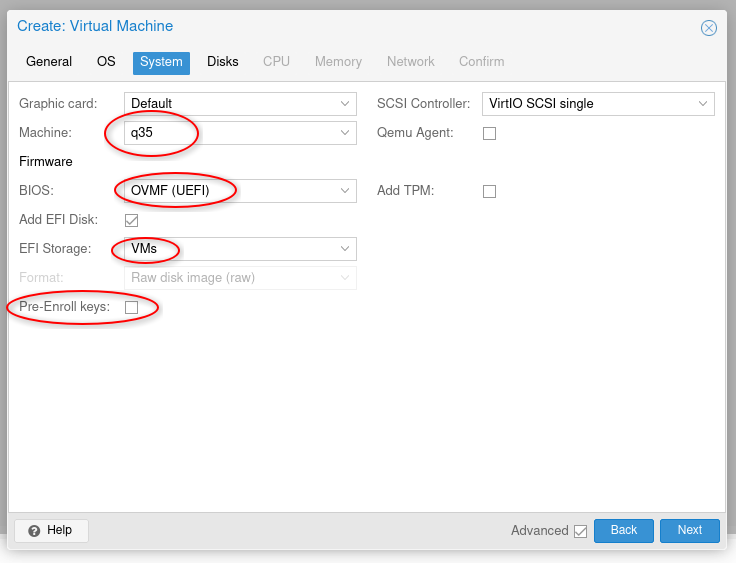
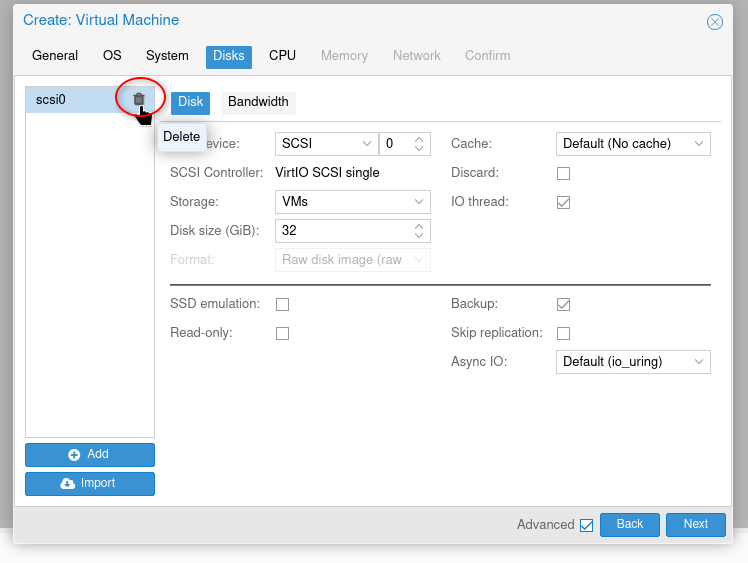
Disks
Proxmox normally creates an empty disk when you create a VM.
We don’t need it.
Delete the automatically created SCSI disk from the VM configuration. The Home Assistant QCOW2 image that we downloaded earlier will become our disk instead.
CPU
I assigned:
2 cores
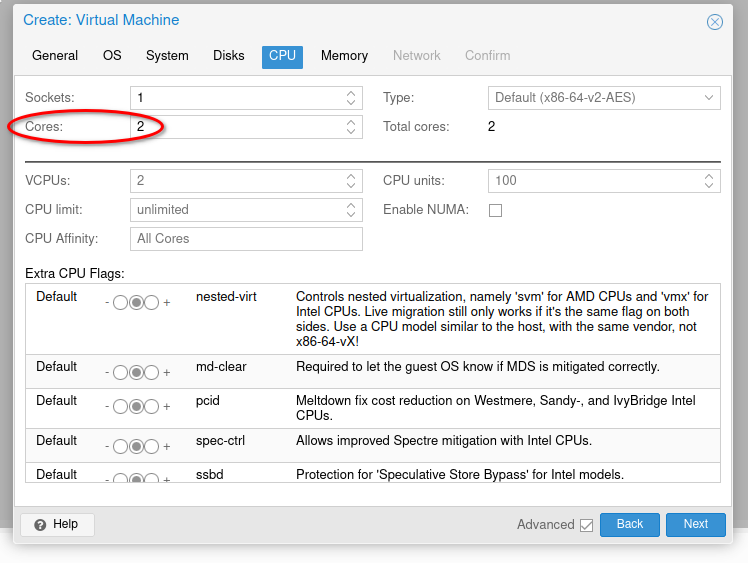
You can give Home Assistant more CPU resources later if your installation grows.
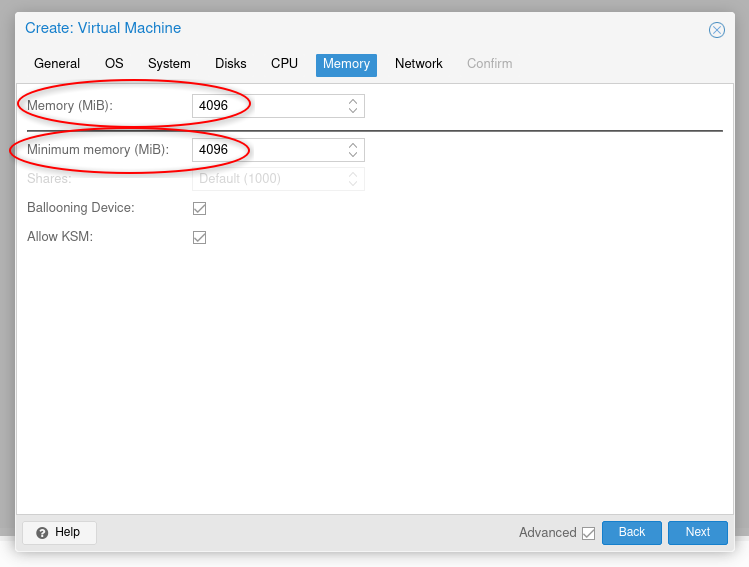
Memory
I assigned:
4096 MB
That gives the VM 4 GB of RAM.
Although Home Assistant currently specifies 2 GB as the minimum for a VM, I preferred giving it 4 GB from the beginning.
Network
I left the network configuration at the Proxmox defaults.
For a typical installation, the VM should be connected to your normal Proxmox bridge so Home Assistant appears as another device on your LAN.
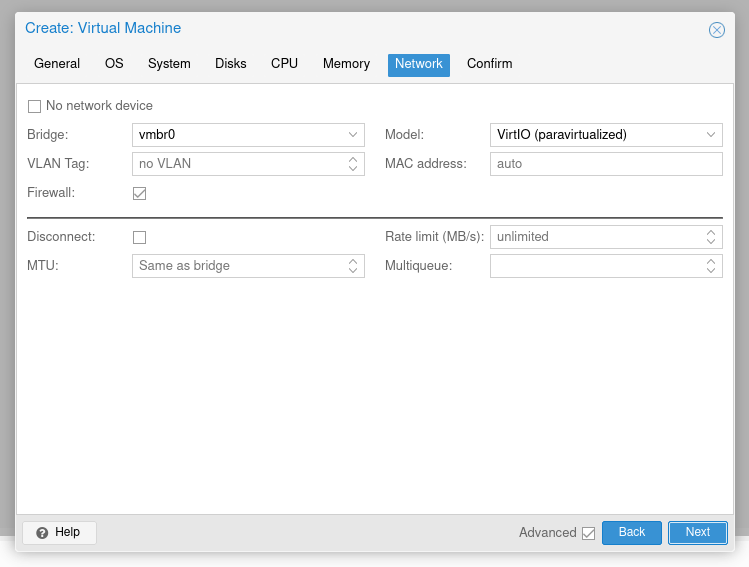
If you’re using VLANs or a more complicated network configuration, adjust this accordingly.
Finish creating the VM.
Do not start it yet.
4. Import the Home Assistant QCOW2 Disk into Proxmox
Now we need to import the Home Assistant disk into the VM we just created.
Go back to the Proxmox node’s Shell.
The general syntax for importing a QCOW2 image is:
qm importdisk <VM-ID> <QCOW2-FILE> <STORAGE>
For example, if:
- Your Home Assistant VM ID is
103 - Your Home Assistant QCOW2 file is in
/root - Your VM storage is
local-lvm
You would run something similar to:
qm importdisk 103 /root/haos_ova-<version>.qcow2 local-lvm
Make sure you replace the VM ID, filename and storage with the values from your own Proxmox installation.
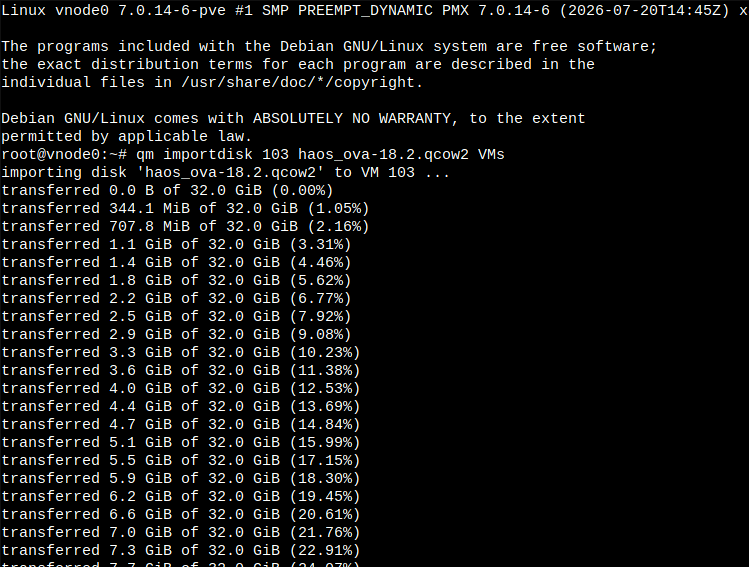
Let the import finish before continuing.
5. Attach the Imported Home Assistant Disk
Once the import completes, return to the Proxmox web interface.
Select your Home Assistant VM and open:
Hardware
You should now see something similar to:
Unused Disk 0
This is the Home Assistant disk we just imported.
Select the unused disk and click Edit.
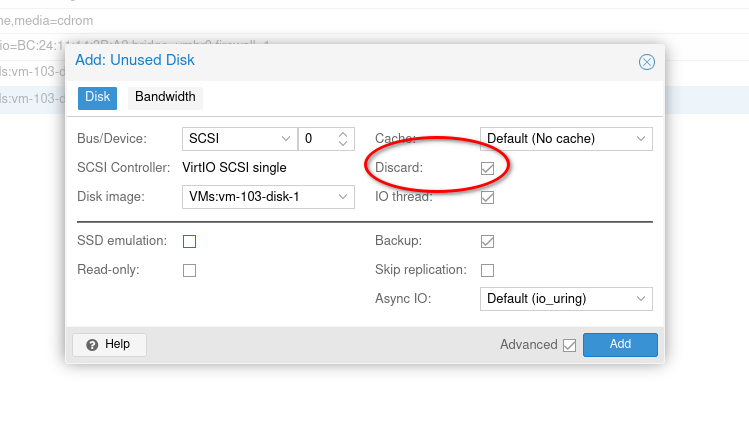
If your Proxmox storage backing this VM is on an SSD, you should enable Discard.
Then, click Add.
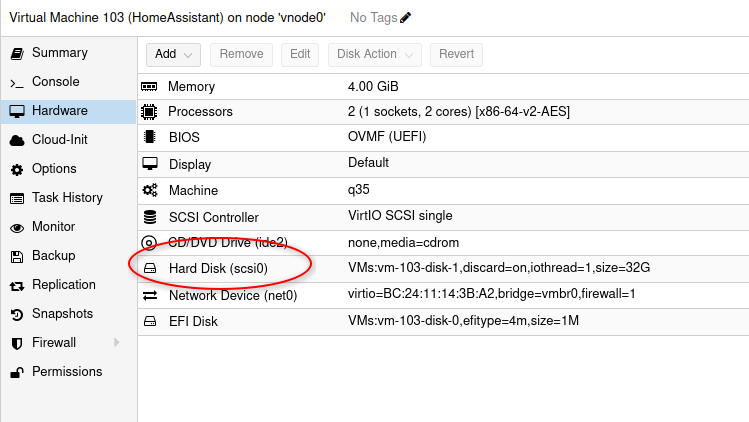
The disk should now be attached to the Home Assistant VM, commonly as something similar to:
scsi0
6. Set the Home Assistant Disk as the Boot Disk
Before starting the VM, we need to make sure Proxmox actually boots from the imported Home Assistant disk.
Select the VM and go to:
Options > Boot Order
Click Edit.
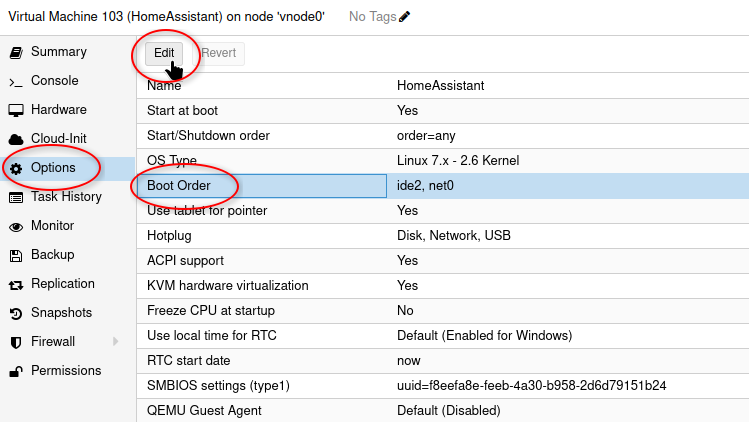
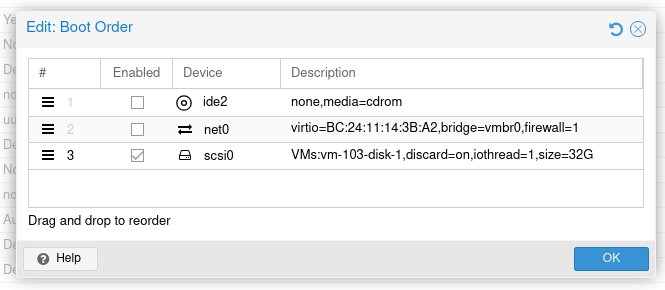
Enable the imported Home Assistant disk. In my case, this was the scsi0 disk.
Disable any unnecessary boot devices so the Home Assistant disk is the VM’s primary boot device.
7. Start the Home Assistant VM
We can finally start Home Assistant.
Click Start.
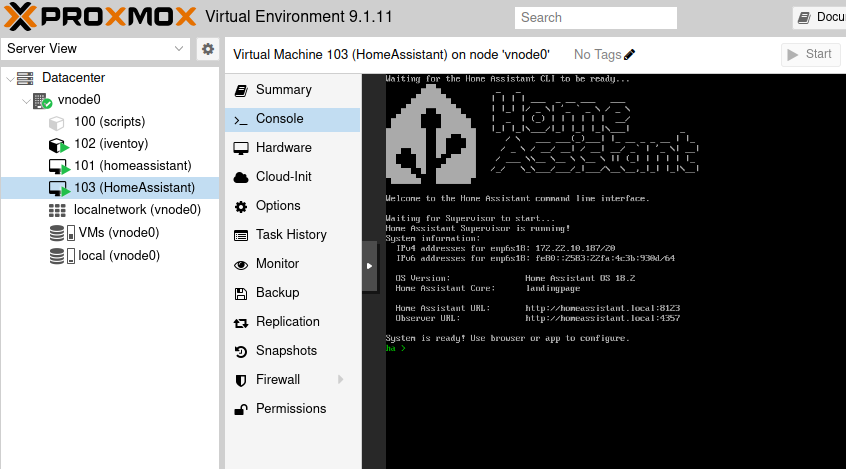
Then, open the VM’s Console.
Home Assistant OS should begin booting!
If everything is configured correctly, Home Assistant will eventually display network information in the console, including the address you can use to access the web interface.
8. Open the Home Assistant Web Interface
Once Home Assistant has booted, open a web browser from another computer on your network.
Home Assistant may be available at:
http://homeassistant.local:8123
Alternatively, you can use the IP address shown in the Home Assistant console:
http://<HOME-ASSISTANT-IP>:8123
For example:
http://192.168.1.100:8123
Home Assistant’s documentation recommends using the IP address directly if hostname discovery doesn’t work on your network.
You should now see the Home Assistant onboarding page.
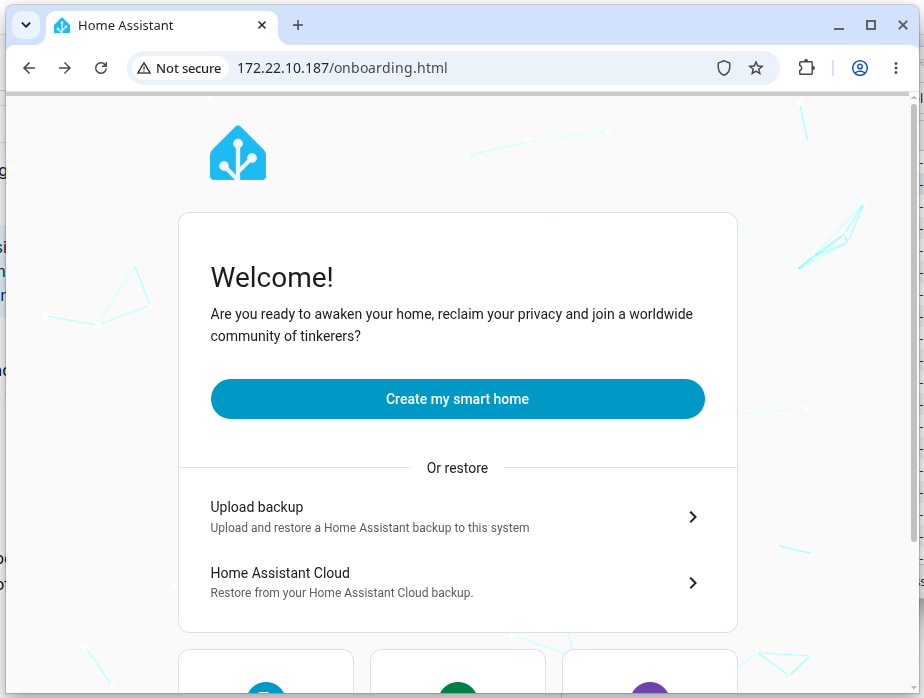
From here, you can create your Home Assistant account and continue with the normal initial setup.
That’s it! Home Assistant OS is now running as a virtual machine in Proxmox.
Troubleshooting Home Assistant on Proxmox
Home Assistant VM Says There Is No Bootable Disk
First, go to:
VM > Options > Boot Order
Make sure the imported Home Assistant disk is enabled.
It will commonly appear as something such as:
scsi0
The imported QCOW2 disk needs to be selected as a bootable device.
Also confirm that you actually attached the Unused Disk after running qm importdisk.
VM Fails to Boot or Shows a UEFI/Secure Boot Error
Check the VM’s system configuration.
I used:
- Machine: q35
- BIOS: OVMF (UEFI)
- Pre-Enroll Keys: Disabled
Home Assistant requires UEFI for the virtual machine, while the Proxmox forum procedure specifically disables the pre-enrolled Secure Boot keys.
There are also reports in the referenced forum thread of Secure Boot preventing the Home Assistant image from booting until it was disabled.
qm importdisk Says the QCOW2 File Does Not Exist
Check your current directory:
pwd
Then list your files:
ls
You can also specify the complete path to the file:
qm importdisk 103 /root/haos_ova-<version>.qcow2 local-lvm
Also double-check the filename. The extension should be:
.qcow2
Make sure you have already decompressed the .qcow2.xz file with unxz.
homeassistant.local:8123 Does Not Work
Try accessing Home Assistant by IP address instead:
http://<HOME-ASSISTANT-IP>:8123
The Home Assistant documentation specifically recommends using the VM’s IP address when local hostname resolution does not work.
You can find the assigned address from the Home Assistant VM console or from your router/DHCP server.
What About Zigbee, Z-Wave and Other USB Devices?
If you use Home Assistant with a Zigbee, Z-Wave or other USB adapter, the physical USB device will need to be made available to the Home Assistant VM.
Home Assistant’s virtualization documentation specifically accounts for passing USB hardware such as Zigbee and Z-Wave controllers through to a VM.
I would get the basic Home Assistant VM installed and working first before configuring any USB passthrough. This makes it much easier to troubleshoot because you know the base Home Assistant installation is working before adding additional hardware.
If you’re planning to use a Zigbee coordinator with Home Assistant, you’ll also need to decide whether to use ZHA or Zigbee2MQTT. I’ve compared both options separately, along with the best Zigbee channels for Home Assistant if you’re trying to avoid Wi-Fi interference.
Why I Installed Home Assistant Manually
There are community scripts available that can automate much of the process of installing Home Assistant on Proxmox.
However, I wanted to install it manually.
Doing it this way makes the VM configuration much more obvious. You know exactly which machine type, BIOS, CPU, memory, storage and boot disk the Home Assistant VM is using.
It also makes troubleshooting easier later because the installation isn’t hidden behind a script.
The process really isn’t complicated once you understand that the Home Assistant download is a preinstalled QCOW2 disk rather than a conventional installation ISO.
The basic process is simply:
- Download the Home Assistant QCOW2 image.
- Decompress it.
- Create an empty Proxmox VM.
- Import the QCOW2 image using
qm importdisk. - Attach the imported disk.
- Make it bootable.
- Start the VM.
- Open Home Assistant on port 8123 at
http://homeassistant.local:8123.
Conclusion
Installing Home Assistant on Proxmox is a little different from creating a typical Linux VM because there isn’t an installer ISO involved. Instead, Home Assistant provides a ready-to-use QCOW2 image that we import directly into the virtual machine.
These are the steps I used to install Home Assistant on Proxmox, and once the VM configuration and disk import were complete, Home Assistant OS booted like any other virtual machine.
For my setup, 2 CPU cores, 4 GB of RAM, q35 and OVMF worked well as a straightforward starting configuration.
Running Home Assistant this way also keeps it nicely contained in its own VM while letting Proxmox handle the underlying virtual hardware and startup of the system.
Remarks
- Home Assistant provides an official KVM/Proxmox QCOW2 image, so make sure you download that image to install Home Assistant on Proxmox rather than one intended for VirtualBox or VMware.
- I used 2 CPU cores and 4 GB of RAM. Home Assistant currently lists 2 vCPUs and 2 GB of RAM as the minimum VM requirements.
- Make sure the VM uses OVMF/UEFI. Home Assistant requires UEFI to boot as a virtual machine.
- If the VM refuses to boot, double-check that Pre-Enroll Keys/Secure Boot is disabled and that the imported Home Assistant disk is selected in the boot order.
- If
homeassistant.localdoesn’t resolve on your network, access Home Assistant directly using its IP address and port8123, such ashttp://192.168.1.100:8123.


Leave a Reply